
Tone on Tone Stenciled Wall

A few weeks ago I was contacted by Cutting Edge Stencils about doing a review and giveaway and I was over-the-moon excited! If you have not yet heard of Cutting Edge Stencils you are missing out big time-they have an amazing selection of on-trend stencil designs that you just can’t find anywhere else. (And not just large wall stencils-they have smaller craft-sized stencils and stenciling supplies as well!)
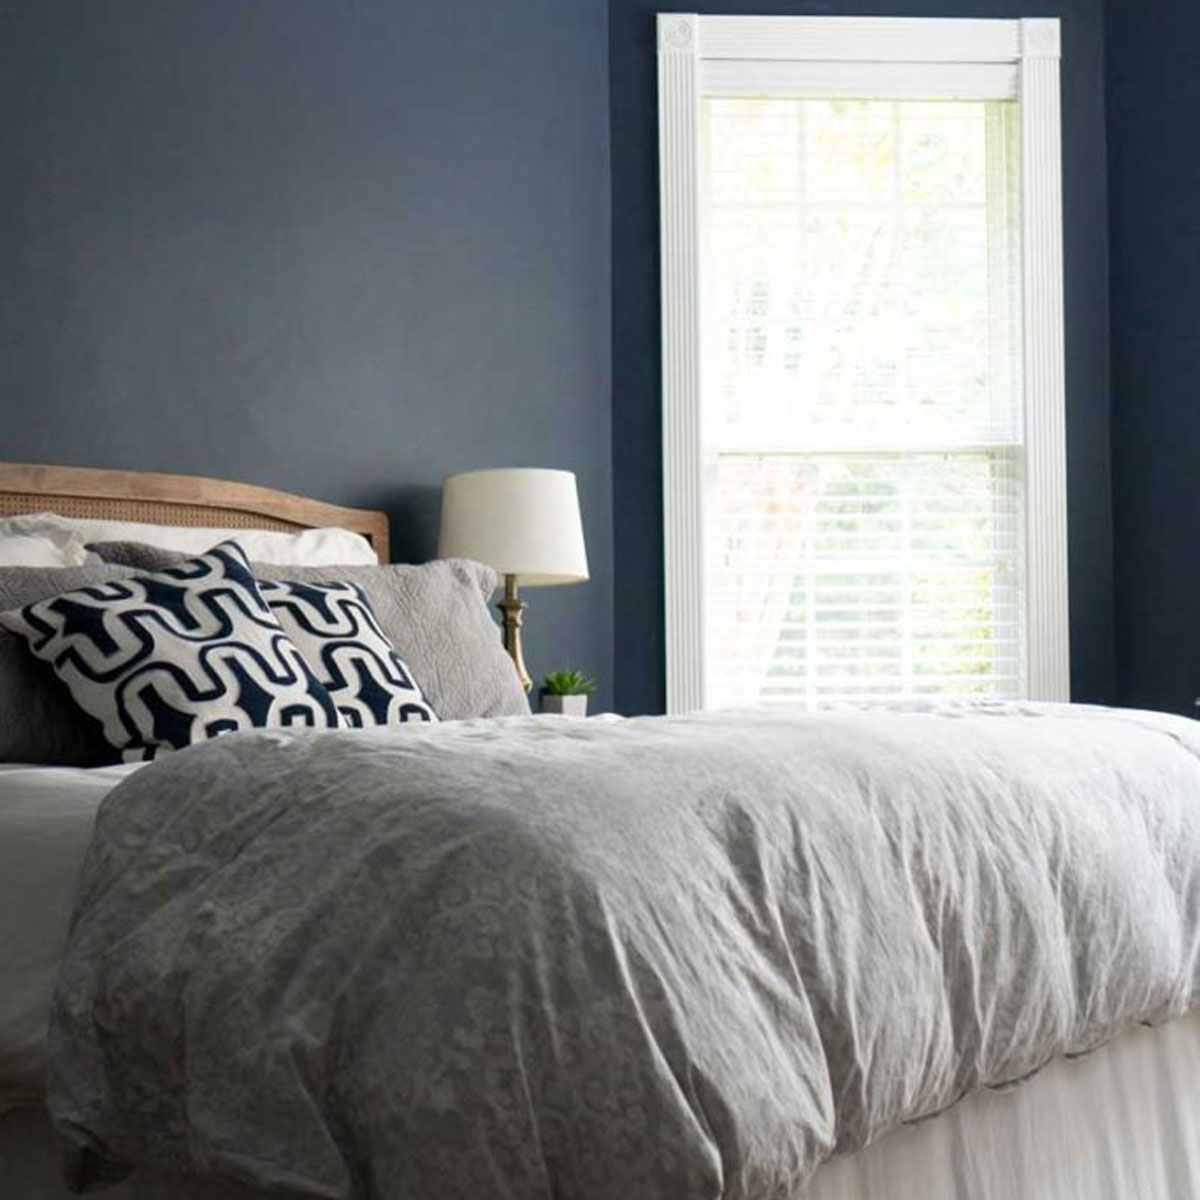
My hubby and I had been planning on painting some tone on tone stripes on one wall in our Master Bedroom per our eDesign with Amber of Simple Dwellings but Amber thought the stencil would work well too so we decided to go for it using the Turkish Tulip Allover wall stencil.
When I received the stencil I was really pleased to see that not only was the large wall stencil in the package, but it also comes with a smaller piece for edging as well as a single of the design (which I of course had to craft with and will show you soon!). Last Tuesday while hubby was working I decided to start. Enter life and three sick kiddos and seven days later I finally finished! This might give you a little hint of why it took me so long!

While I may have said a few choice words during the process I am in love with how it turned out. This was my first time stenciling and if I can do it, anyone can! Here are a few tips and things I learned along the way:
- I highly recommend using Cutting Edge Stencil’s clip-on stencil level if you are doing an all-over design like the one I used, it was so helpful.
- A dense foam roller and stencil brush are must-haves as well to get a good end result.
- Cutting Edge Stencils has a wealth of info on their site including tutorial videos. These people do this for a living-take advantage of their suggestions and watch the tutorials before you begin!
- Don’t freak out if you think the stencil doesn’t look perfect as you are painting-this isn’t wallpaper and it is not going to be exactly perfect but you won’t be able to notice at all once its finished-believe me! This was such a cause of concern for me during the process and once the wall started filling up you couldn’t tell at all where those tiny imperfections were. I actually prefer the slight variations in the paint over the flat look of wallpaper.


Love the paisley allover stencil!
Oh Melissa, your wall looks gorgeous! I like just the one feature wall done too, so beautiful!
It looks fabulous!!! I have gotten the fish scale but I want the kitty stencil. I don’t know why…but I do!
Love the Diamond Damask Stencil! Thanks for the chance to win!
It looks awesome!! I would love to do this in my bedroom and/or study!! I love the Marrakeh Trellis Allover pattern. Thanks for the giveaway!!
Love these stencils! How much is too much?? I want to stencil every room!!! I hope I win!
There are so many I love it would be hard to choose – I love this one and the Morrocan especially.
Love, love the citrus leaf stencil for the ceiling. We are renovating a 100 year old house and I can see this would look beautiful in the dining room. Thanks for the opp.
Oh. Boo! I can’t enter! Still pinned it! Look how pretty and serene your bedroom looks now! Love it!
Fun! I’ve been wanting to try some stencils and haven’t had the chance yet. I’m thinking a table top….
i like the fossils for i am doing my boys room and he likes fish, ocean, etc.
I love the Nagoya all over stencil
This looks amazing! I love how it turned out. Thanks for the shout out! 🙂
I love the Dandelion Stencil
I love the Diamond Damask Stencil! [email protected]
I think I’d choose the Birch Forest Allover Stencil!
coriwestphal at msn dot com
I like the chandelier stencil!
I really like the LILY SCROLL ALLOVER STENCIL–thanks for the chance to win!
lily scroll alll over stencil
I love the Naya Damask stencil. Anything Damask is AWESOME!!
I like the new paisley pattern
I’d love one of their craft stencils!
what stencil I would pick if I win is Wall Stencil Cordoba!
I’d choose the Nadya stencil!
all over poppy stencil thanks
I really like the Harlequin trellis allover stencil
I would love the SPRING SONGBIRDS WALL STENCIL
Probably the poppy stencil. What fun!!!
Your wall turned out great! Glad to hear it is not hard to do.
Your bedroom looks amazing! I love the look of the wall with your headboard, so chic!
All of the stencils on their site are inspiring for home DIY I’m not sure how I would pick but I am immediately drawn to the Casablanca Allover (plus its one of my favorite movies too!)
Love the CASABLANCA ALLOVER STENCIL
RCform – Bud L
PS Love your tips
Love the Acacia Allover Stencil!!
I like the Outside of the Box stencil
I love the Rabat Allover Stencil.
I Love these! I would pick the birch forest all over stencil!
i like the Butterfly and Dragonfly Stencils, 4 pc kit and the Casablanca Allover Stencil
I really love the tree and branch stencils and the fresco and mural stencils!
Flower and Vine stencils.
I would pick the Birds on a Branch Wall Stencil for my son’s room!
I would pick the Birds on a Branch Wall Stencil for my son’s room! Very cute!
I’m not sure which one I’d get, but Fuji would definately be a consideration.
birch forest all over stencil
*kelly
[email protected]
I love the rabat all over stencil!
I like the Funky Wheel Wall stencil.
hugsnlove36 at hotmail dot com
I might get the Nadya Damask Stencil.
I love the paisley all over stencil
lvoe the Ammonite Large Fossil Stencil
I like the Casablanca Allover Stencil. (Also like the Casablanca Craft Stencil too!)
Paisley Allover Stencil
There’s so many to choose from. I liked a lot of the Damask ones. I also like the Candy Cane and Snowflakes Kit. I’d have to say my fave is the Butterfly and Dragonfly Stencils. Thank you so much for this Awesome giveaway! 🙂
I would love the SPRING SONGBIRDS WALL STENCIL
I would love to win any of the paisley stencils!
I really love the Floral Filigree Wall Stencil! It looks super cute!!!
Thank You So Much for the chance!
I love the sweet dreams stencil.
Nadya Damask Stencil
FUNKY WHEEL WALL STENCIL
Love the Wise Owl Stencil. Thank you!
Wooooooohooooooooooooooo – so excited —-Thanks!
Good looking wall mellisa. The room is very inviting. Thanks for sharing.
What a gorgeous stenciled wall! Love the design. Your headboard is awesome! I would like to invite you to share this at my party, Twirl & Take a Bow at http://www.houseontheway.com. Hope you can join in on the fun!
Leslie
Love the stencil wall! Great job!
I love how your walls turned out! I want to do this myself. Did you use two different colors of paint? Did you use a different finish for the stenciled part? Thanks!
Hi my lovedd one! I want to say that this post
is awesome, great written and come with almost all important infos.
I’d like to peer extra posts like this .