Garage Makeover

While the garage might not be the most glamorous part of the house, I’m still very proud of how we updated and refreshed the garage of our 1997 home. Let’s get started!
At our last house, we had an oversized two car garage with a half bath and large apartment on the second story. We used one half of the garage as a bit of a man cave with shuffleboard, a couch, and tv; so I wanted our new garage to be “hang-out-able” as well. (Although we left the shuffleboard for our buyers!)
Getting started
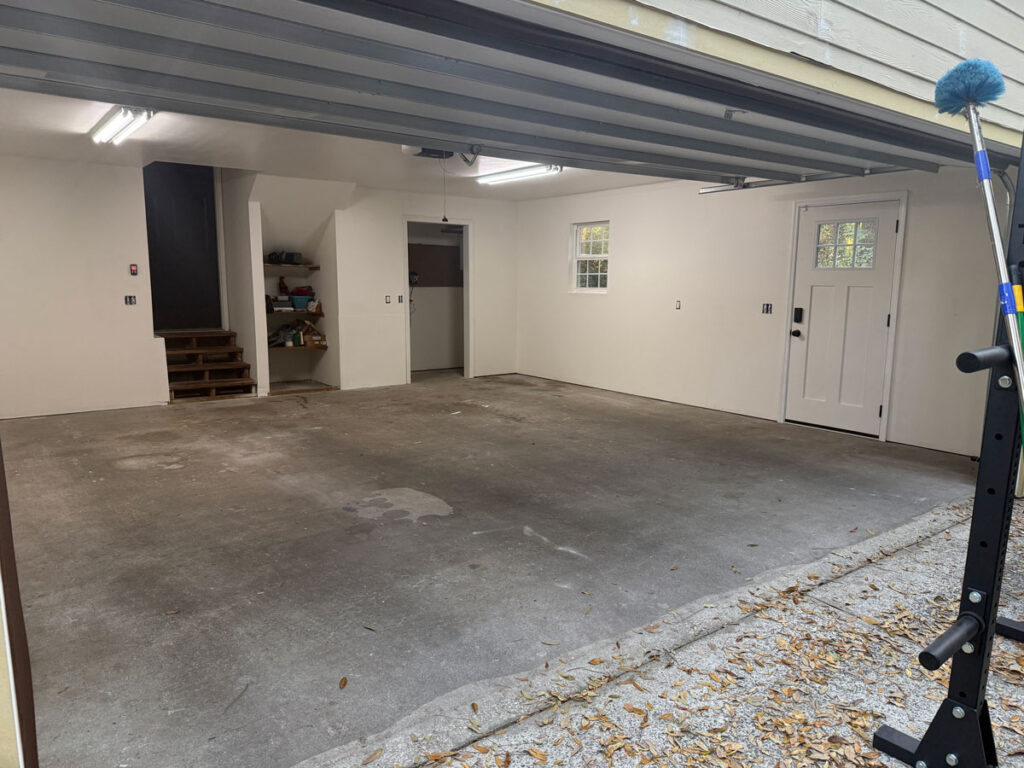
Our current home has a two car garage but it is not oversized and it wasn’t in great shape. It was musty and dark and NOT somewhere you’d want to hang out in a man cave!
The first task once we moved in was to get it cleaned up. We started with a badly needed pressure washing of the driveway as well as some drywall repairs inside.
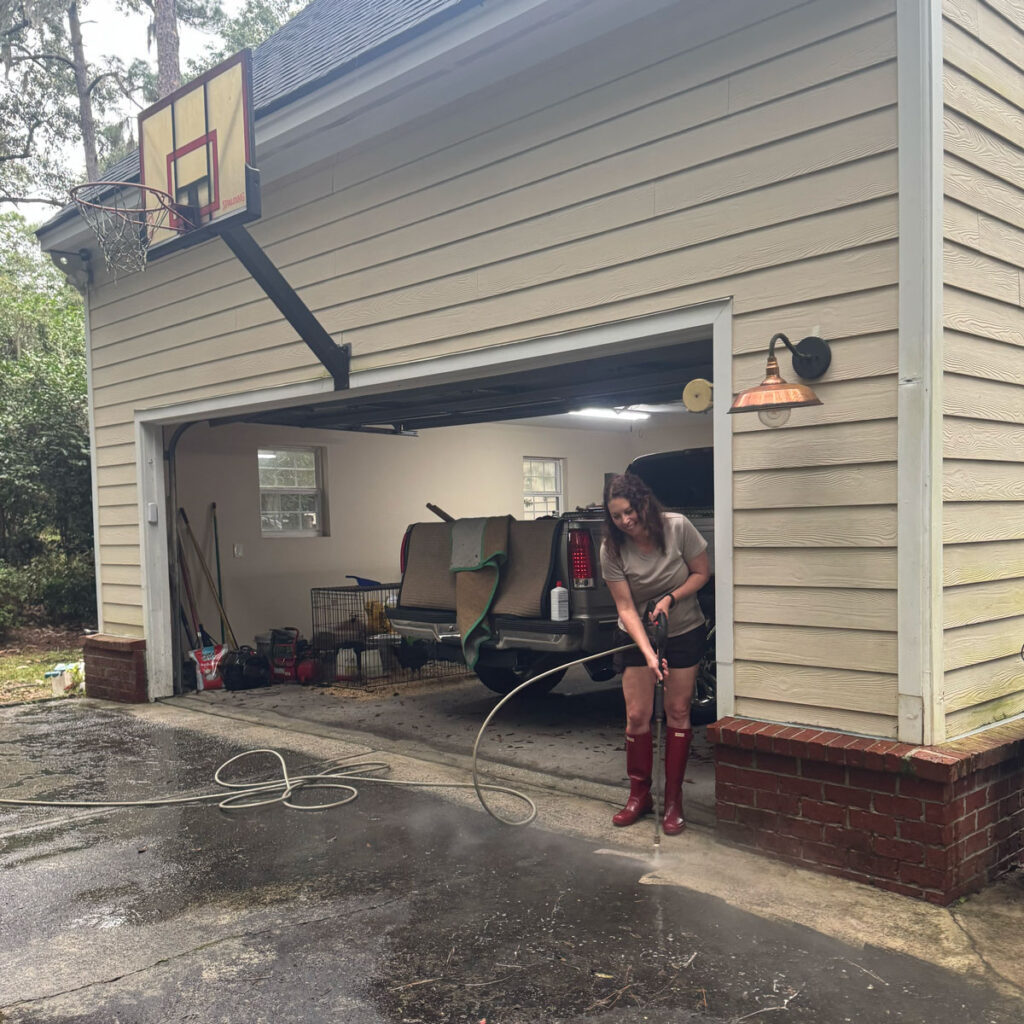
(See the “baby” chickens in the cage behind the truck? They moved into the coop a few weeks after we made the move.)
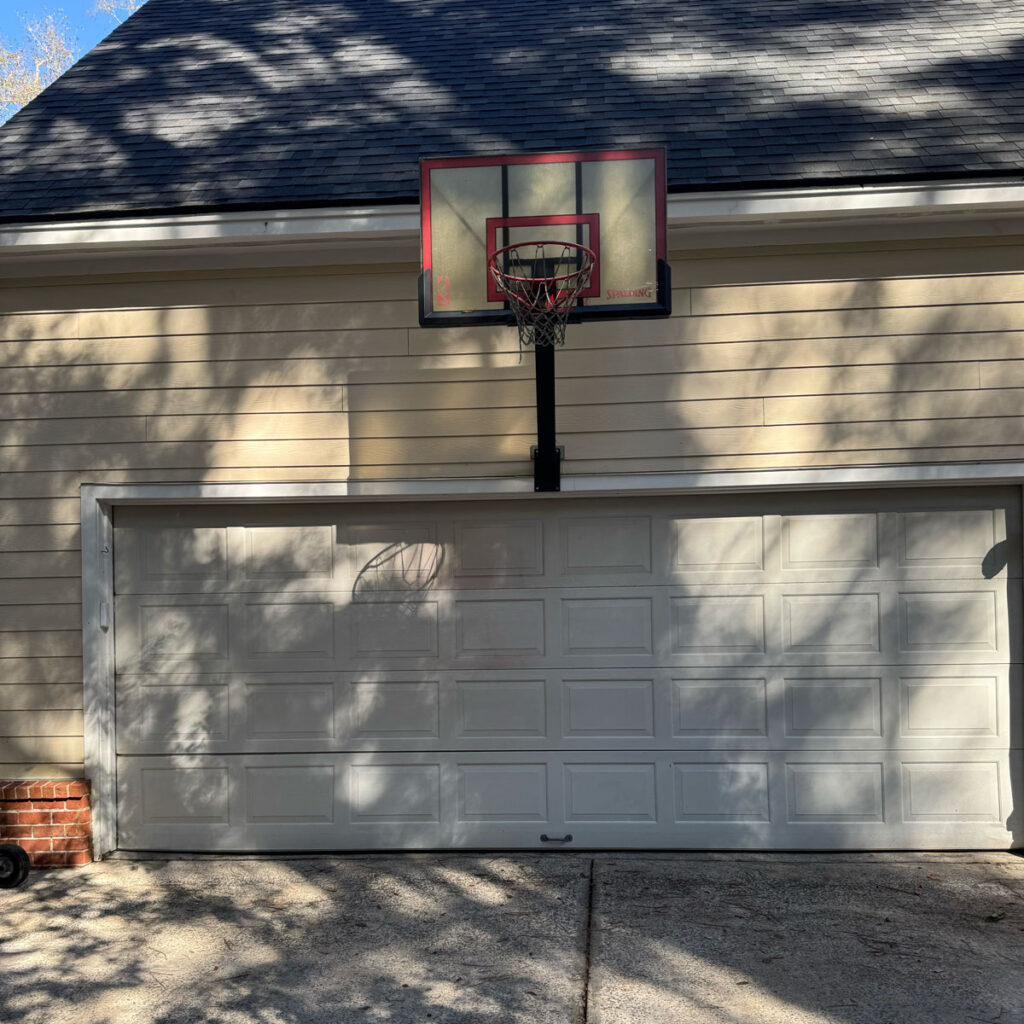
We also took down the basketball hoop as our boys wouldn’t use it and it looked a bit precarious hanging up there!
Repairing exterior
If you look at the corner of the house in the pressure washing image above you can see some damage to the hardy board and some obvious patchwork repairs that were made to the trim. We knew we needed to have these areas addressed asap so we had our exterior contractor come into see how bad the damage was.
(It was bad.)
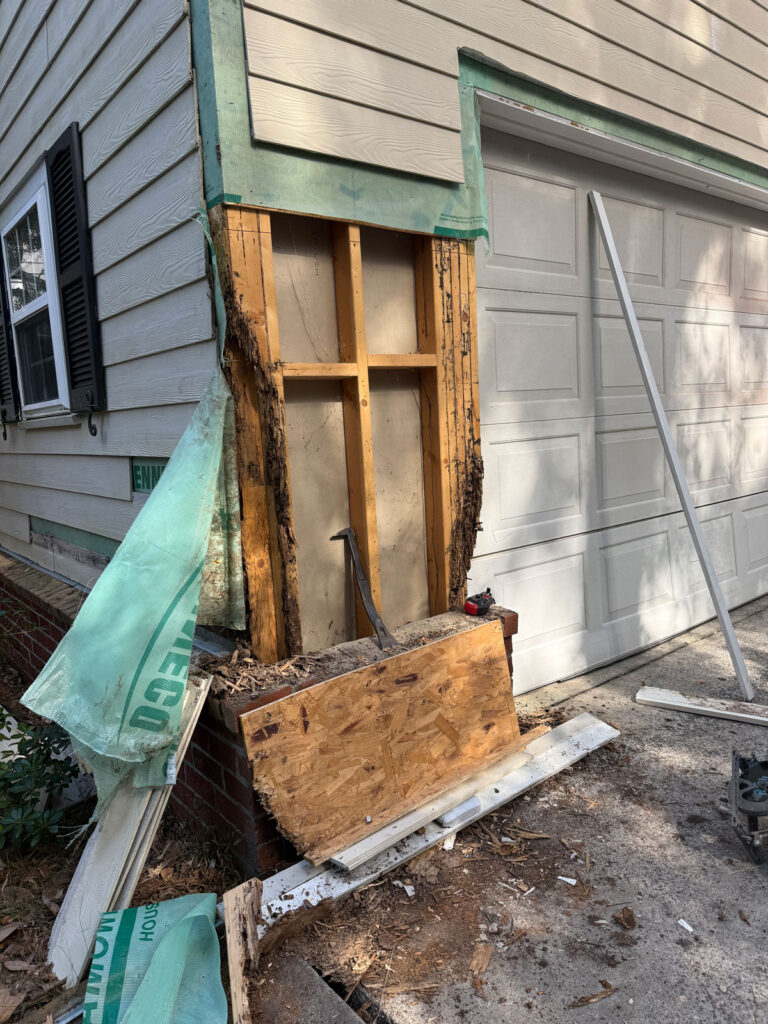
The amount of damaged wood he uncovered was startling. He had to reframe out all of that load-bearing area around the garage. It was old termite damage (thankfully not active) along with water damage but it was crazy that it was never repaired.
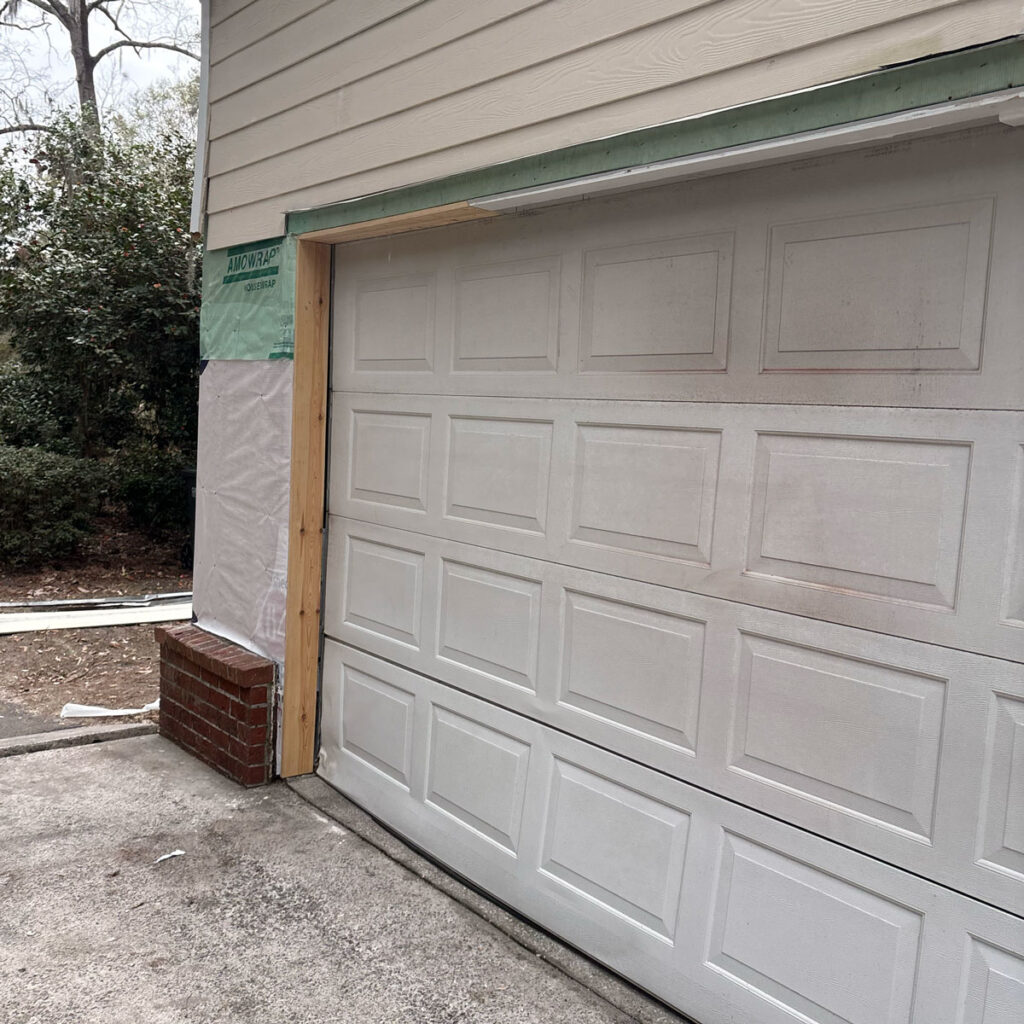
Replacing garage doors
Once all that work was finished the next step was to replace both the garage door and the exterior door to the backyard. Both were probably original to the house. The door to the backyard had rotted away to where there was actually room for creatures to get in the garage, and the garage door was dented and just generally rough looking.
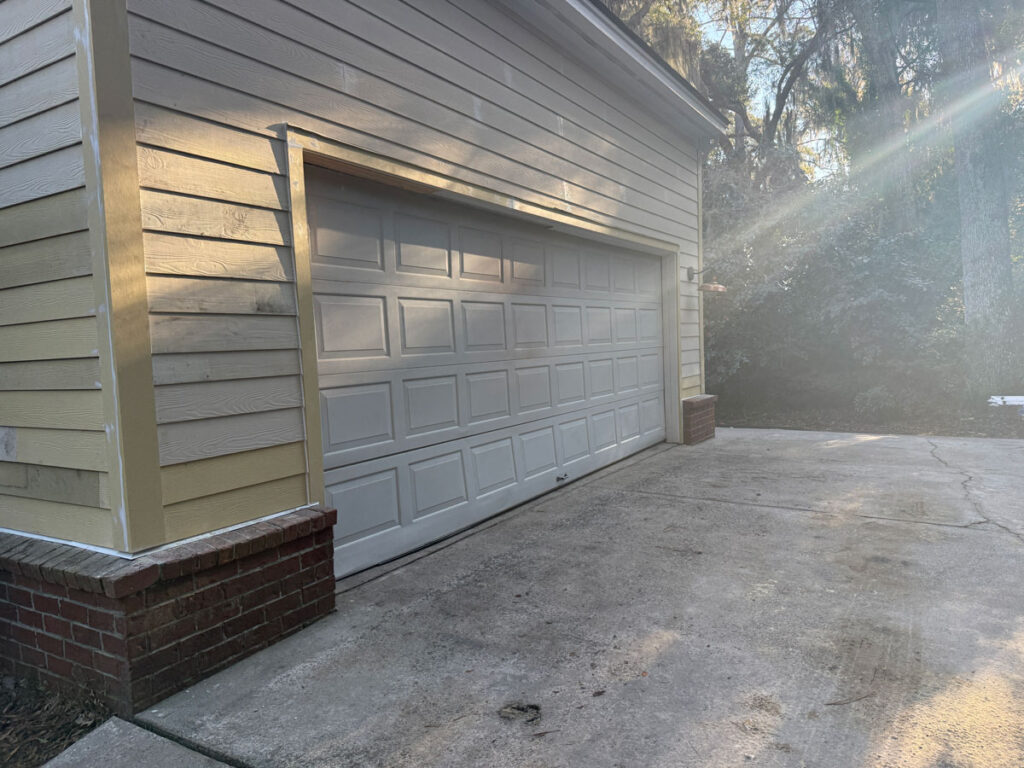
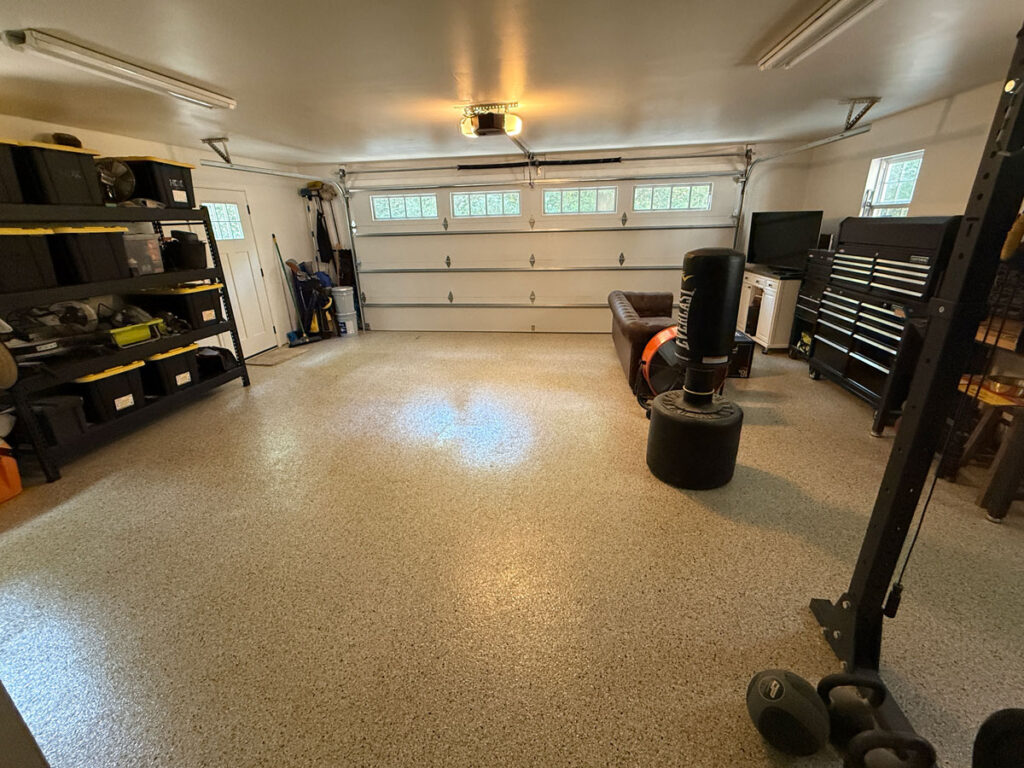
We chose to go with a wood-look garage door with windows.
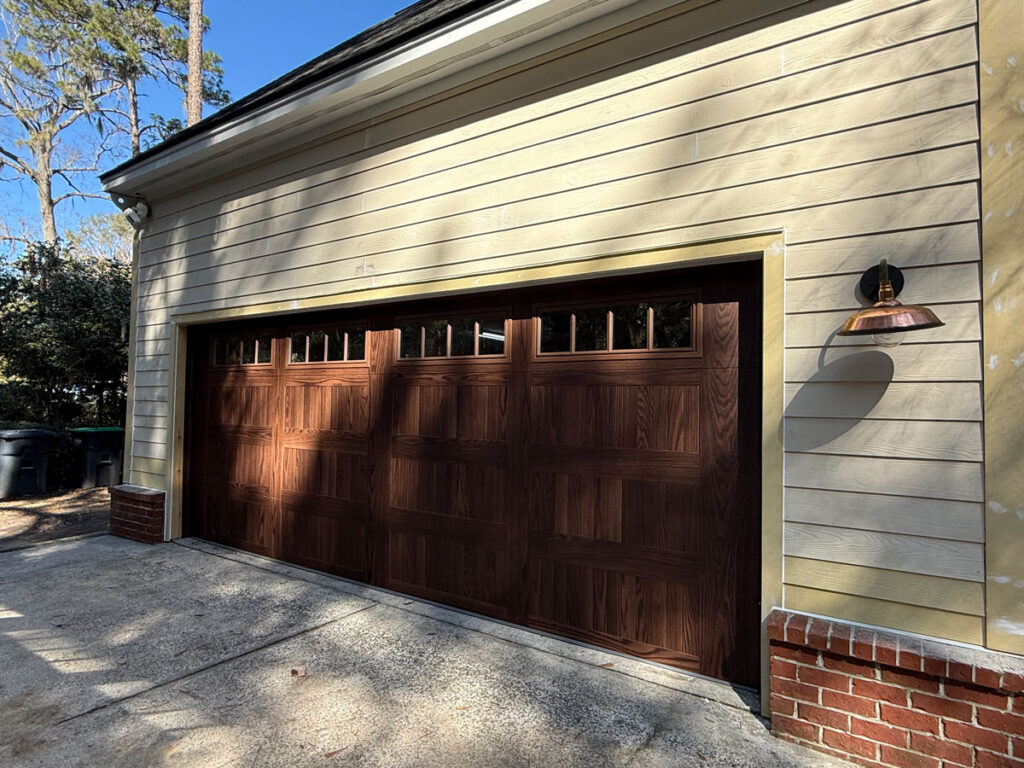
Doesn’t it looks amazing?? I love it!
You can see all the darker hardy board was new boards that had to be replaced, such a nightmare, more info on how that process went on the rest of the house to come!
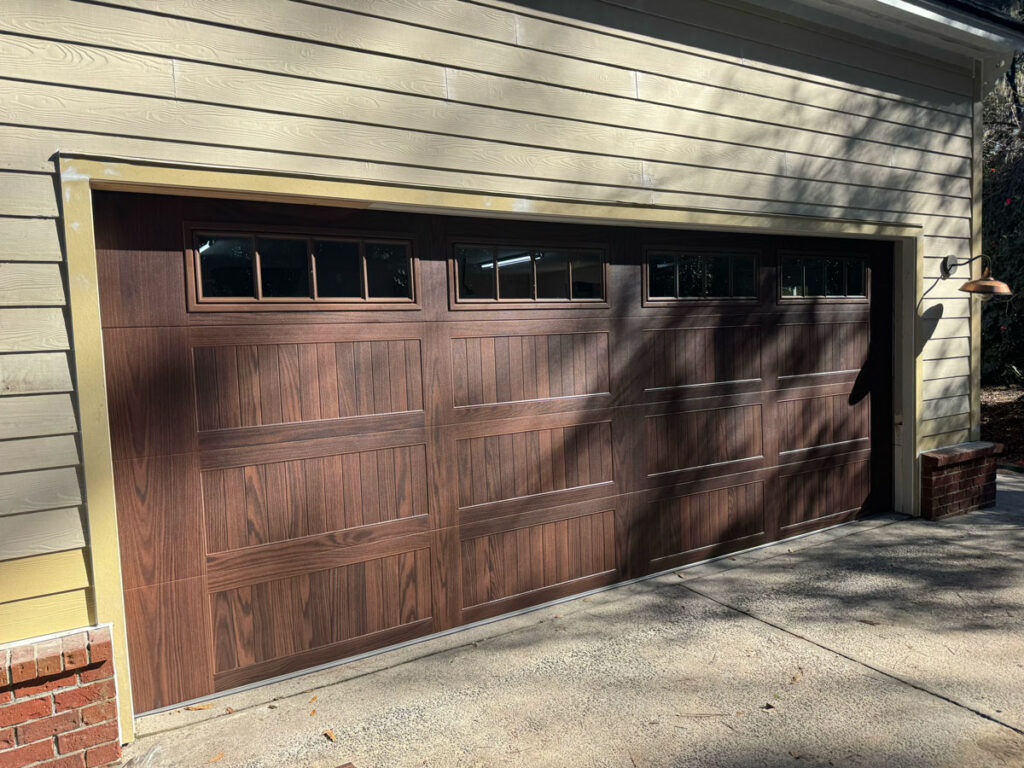
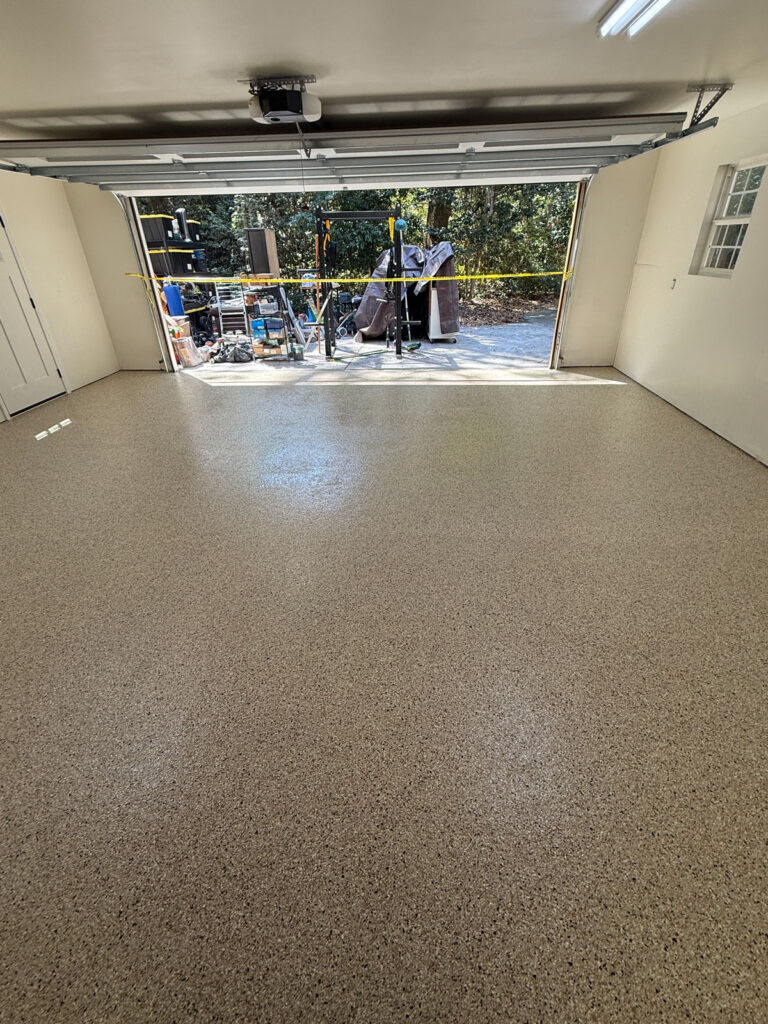
Not only does the door look way better, it also makes the interior of the garage way brighter when the door is closed, which is a nice bonus.
Painting the interior
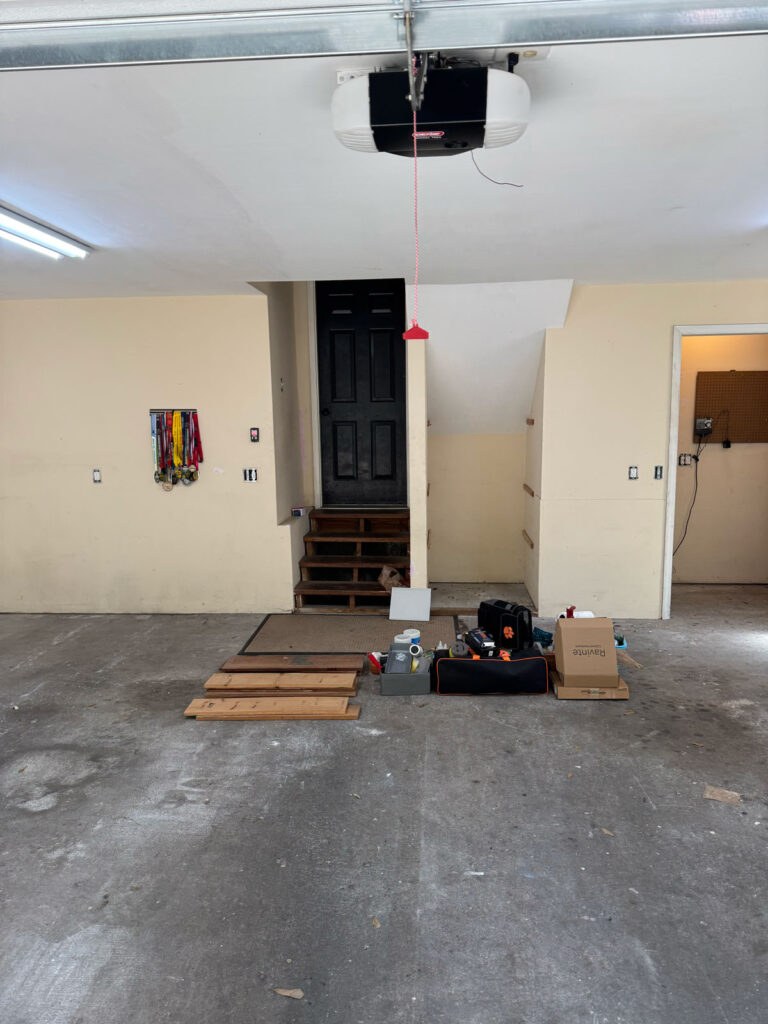
We knew were going to be putting down a floor coating so we decided to give the inside of the garage a fresh coat of paint beforehand so we wouldn’t need to worry about drips on the floor.
I don’t have much in the way of pictures of the walls before painting other than the before but it was scuffed up and marked up just as you would expect a 28-year-old garage wall to be. We painted them with this primer tinted to Swiss Coffee.
At this point I had just painted all of the kitchen cabinets for the kitchen remodel and I was about over painting. I admit I was a little cranky about my husband insisting we get it done but I admit it does look much brighter and cleaner now.
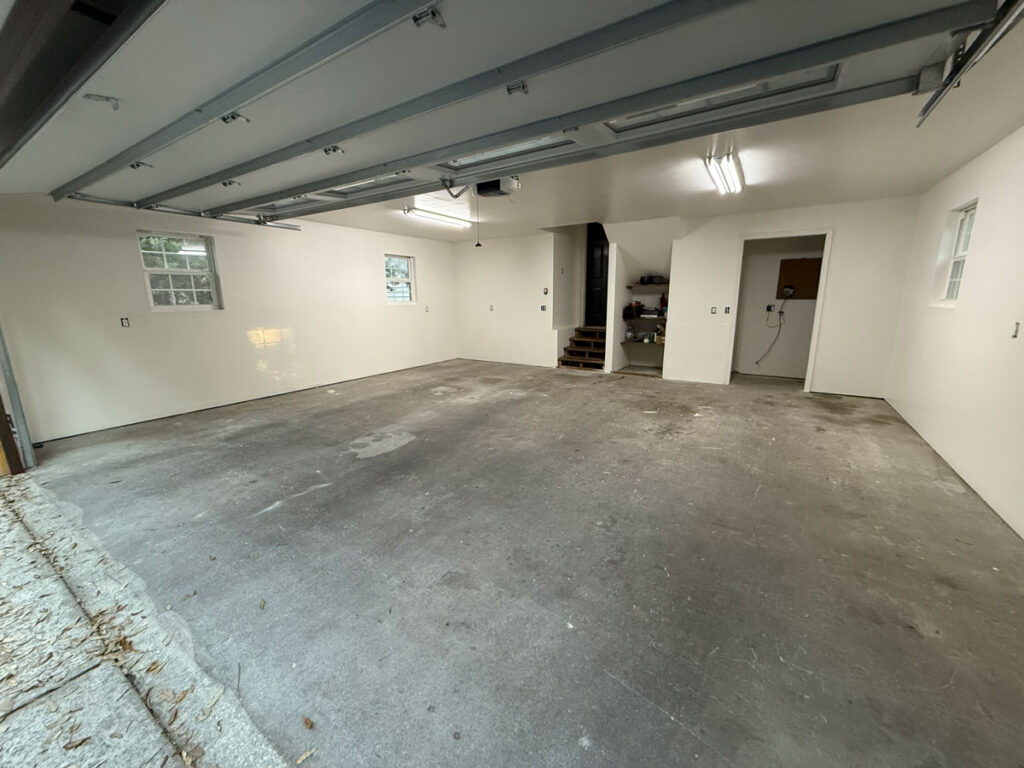
Garage Floor Coating
Finally it was time to do the garage floors! We had never had a floor coating in any of our previous homes and I really wanted it for this house.
It would have been much easier to do before we moved our things into the house but as I mentioned in the new house tour, we were carrying two mortgages and pretty stressed and it was not inexpensive so it moved down the list.
We chose a polyurea and polyaspartic floor coating from a local installer. It is six times more durable than epoxy and has UV protection built in so it won’t yellow over time. I got multiple quotes from different companies and the prices were all similar, averaging between $6-7 a square foot (as of 2025 in Savannah, Ga.)
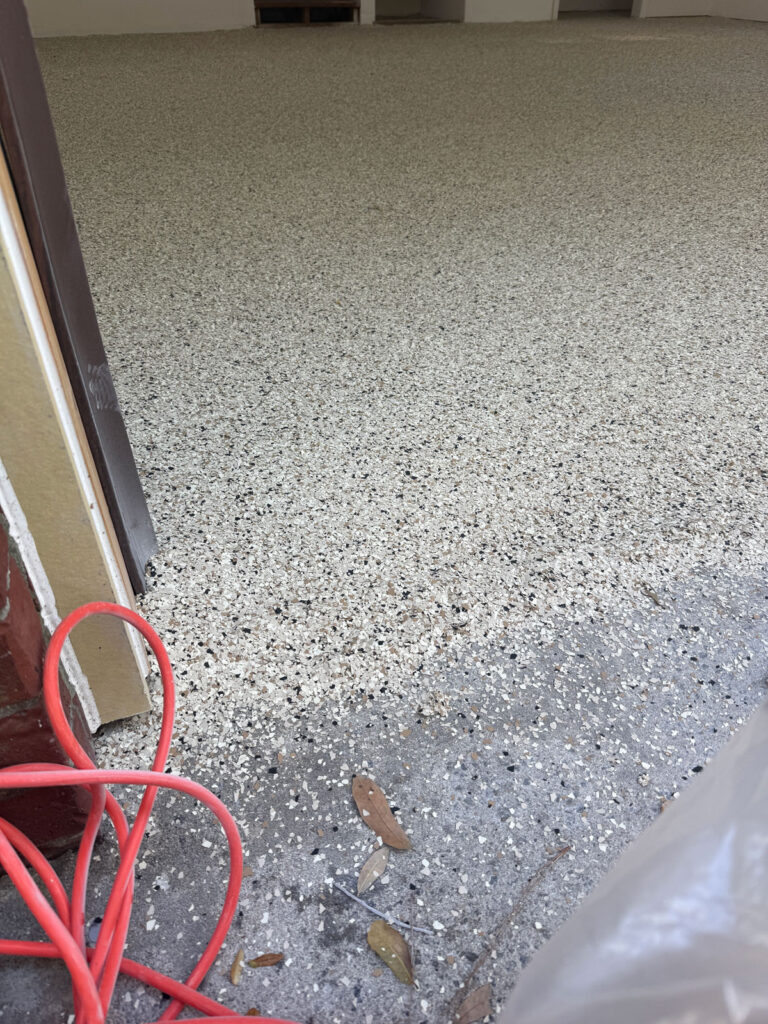
The install process was pretty seamless, we had to empty the garage and the flooring was put down in less than 5 hours. They did a grinding on the concrete to etch it so the coating could stick, then put down the flakes (we chose the color Driftwood), allowed it to sit an hour and then put the top coating on.
After it was applied, we couldn’t walk on it for 24 hours and had to wait 48 hours to put anything heavy on it. (See our lovely pile of stuff in the driveway!)
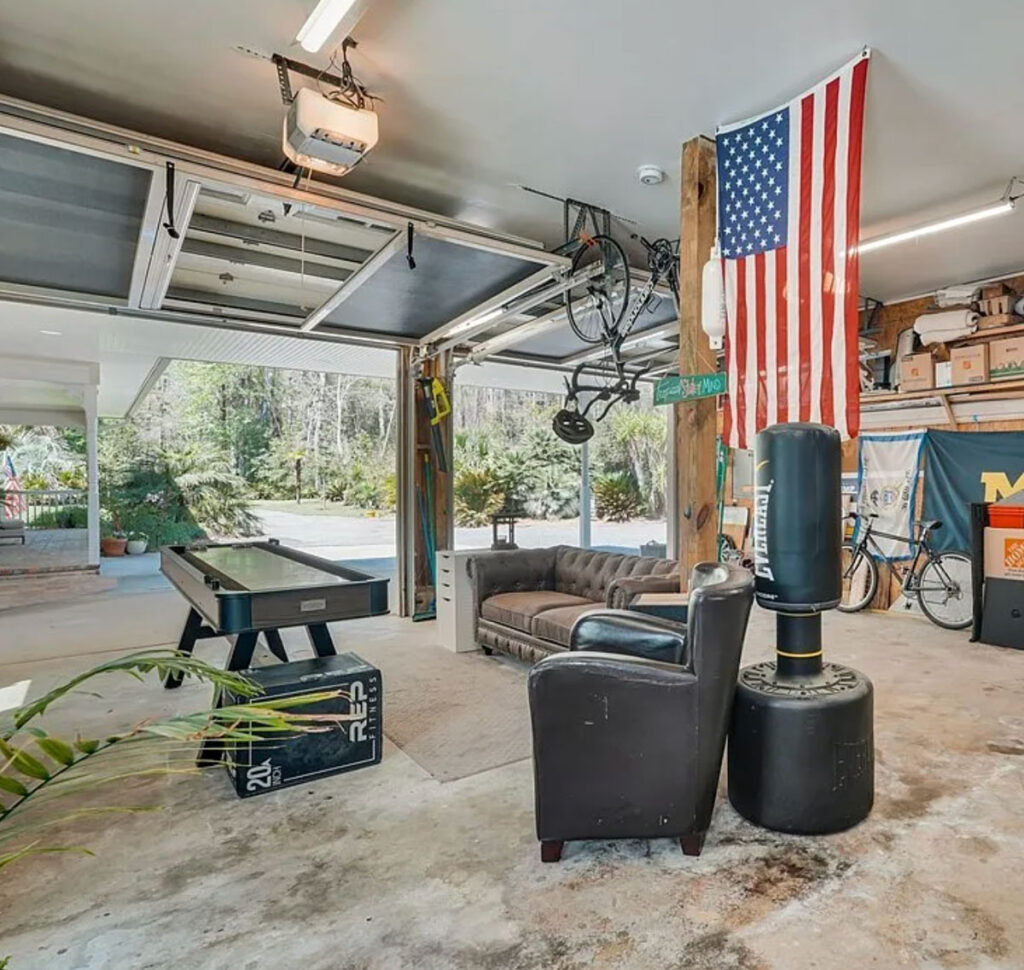
After
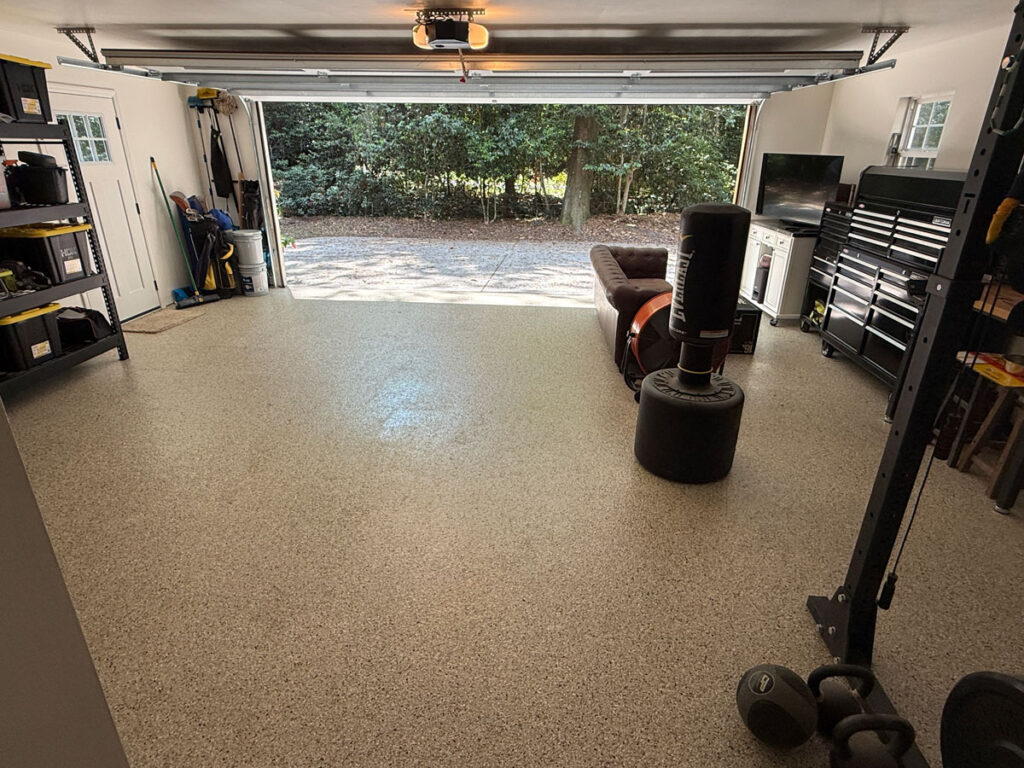
I really am so please in how this space transformed. We’ve done a lot to this house to include the kitchen renovation, upstairs bathroom remodel, master bath remodel, and redoing the wet bar but the garage transformation has a special place in my heart of all of them because it turned into such a perfect spot for my husband and our boys.
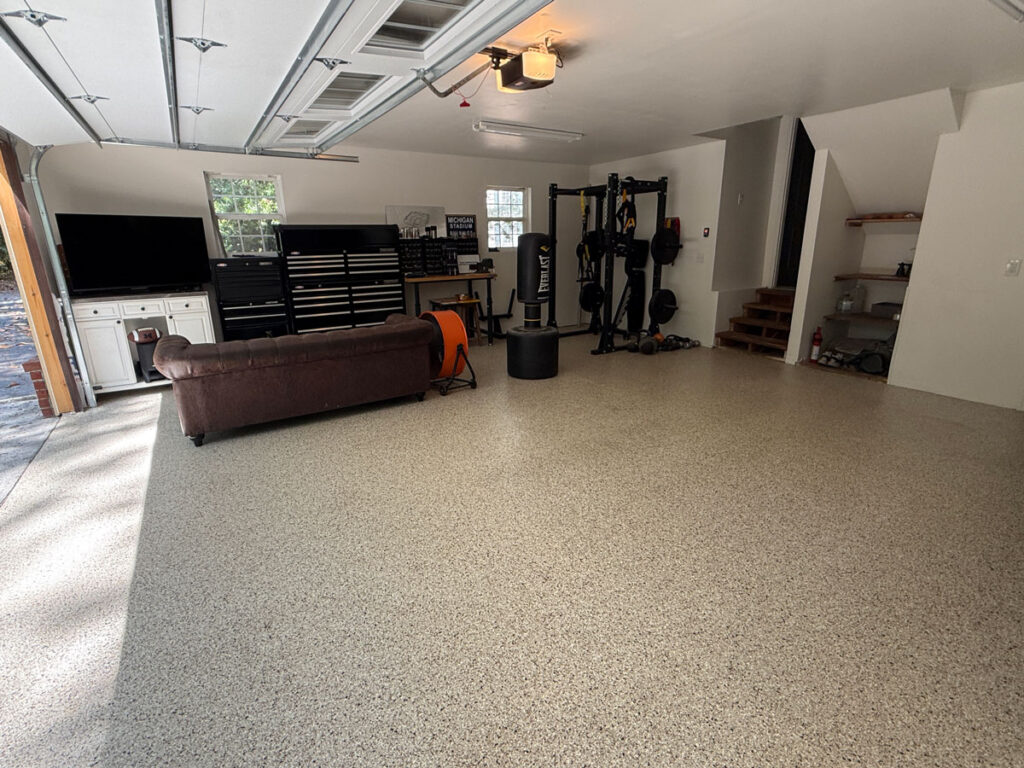
It’s not uncommon for me to find my husband out here on the weekend mornings enjoying a movie and a cup of coffee or putzing around with one of his new toolboxes. I also often find one of my teen boys working out after school.
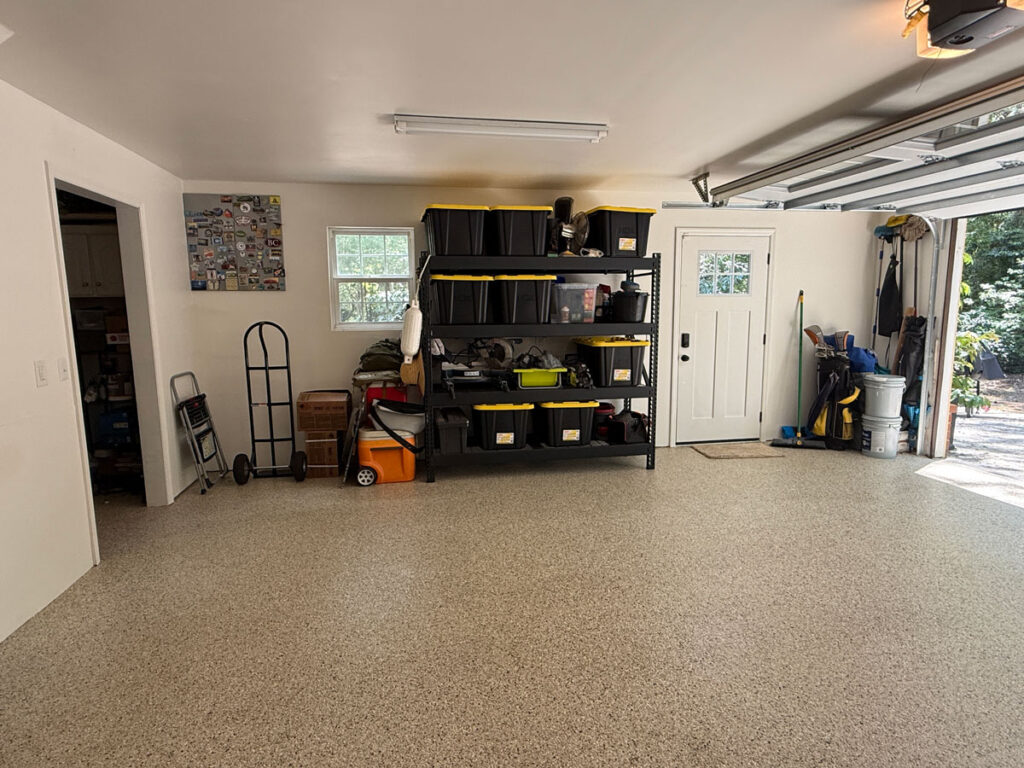
I’m also loving the garage storage shelving and storage bin system Randy set up. It’s way better than the cardboard boxes we used to store everything in the past.
SHOP THE GARAGE

So what do you think? This is my first garage glow up I’ve ever shared and I’m pretty proud of it!