
How to Paint Cabinets

Painting kitchen cabinets is an inexpensive way to update your kitchen but it is a big project. Learn tips and tricks, as well as what NOT to do in this comprehensive tutorial.
Well I finally am getting around to sharing the ins and outs of the kitchen remodel we finally finished right before all this mayhem hit the US in March! Better late than never! In case you need a reminder, here is the “before” picture of the kitchen. (bleh)

I knew from the time we bought the house that I wanted to paint the cabinets but I kept putting it off thinking I needed to wait until we replaced the counter (thinking the cabinets might get damaged) but that wasn’t the case. In retrospect I wish this had been one of the first projects we did when we moved in the house!

I already shared how we lowered the breakfast bar, which allowed us to then have the kitchen measured for the new countertops. After the counters were installed (above) we ripped out the backsplash behind the cooktop and I was ready to paint!
What Kind of Paint to Use on Kitchen Cabinets
I originally planned to use the Rustoleum Transformation kit that is specifically made for painting cabinets. I purchased the kit in white and the morning I was ready to paint I sat down to look at tips on YouTube and got totally spooked.
I found multiple videos showing how it was scratched and dinged up within months. At this point I started freaking out! I got in touch with a friend who had recently painted hers and she recommended Benjamin Moore Advanced Paint in Satin.

Her recommendations were confirmed when I went to our local hardware store and they said it 100% was the best choice. They said no primer would be needed, just clean the surface well to ensure any dirt or dust was gone and then paint! I asked for the “standard white” and this was the color they gave me.

How to Paint Kitchen Cabinets
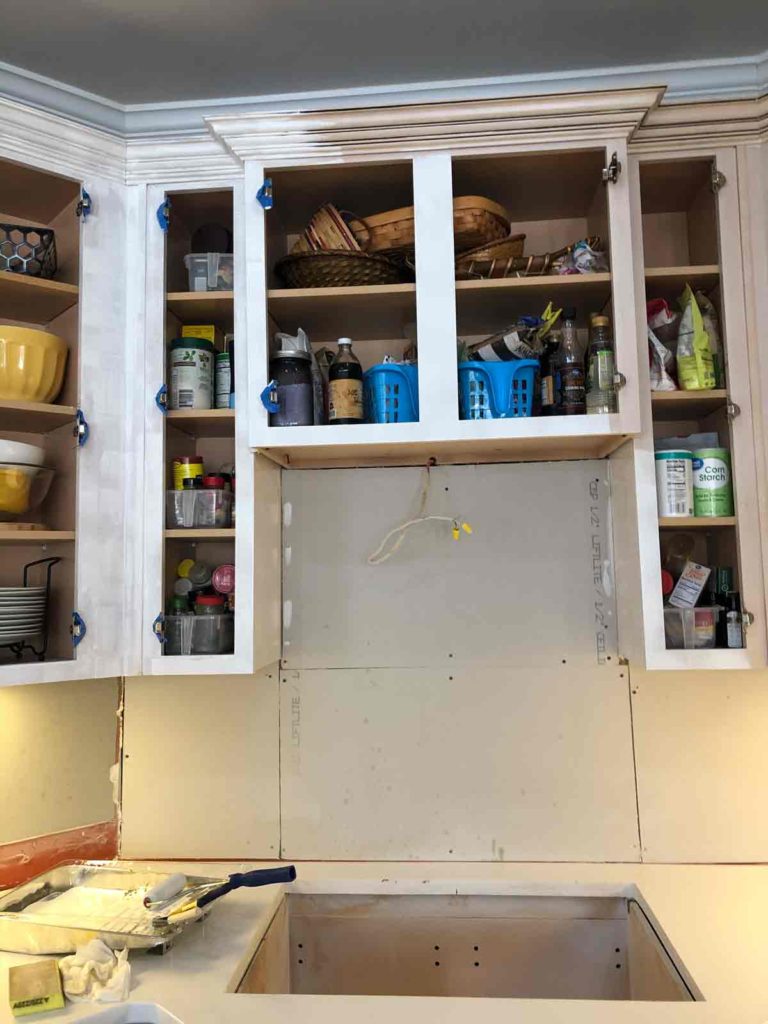
Remove the cabinet doors & hardware

It’s important to be organized when removing the cabinet doors and hardware. I used blue painter’s tape to label the doors and drawer fronts by number (there were 30 total in case you were wondering!)
As I removed the doors and drawer fronts, I place the hardware in a plastic bag labelled with the number for easy reference. We were replacing the pulls and drawer handles but if you were not you would want to include those in the bags as well.
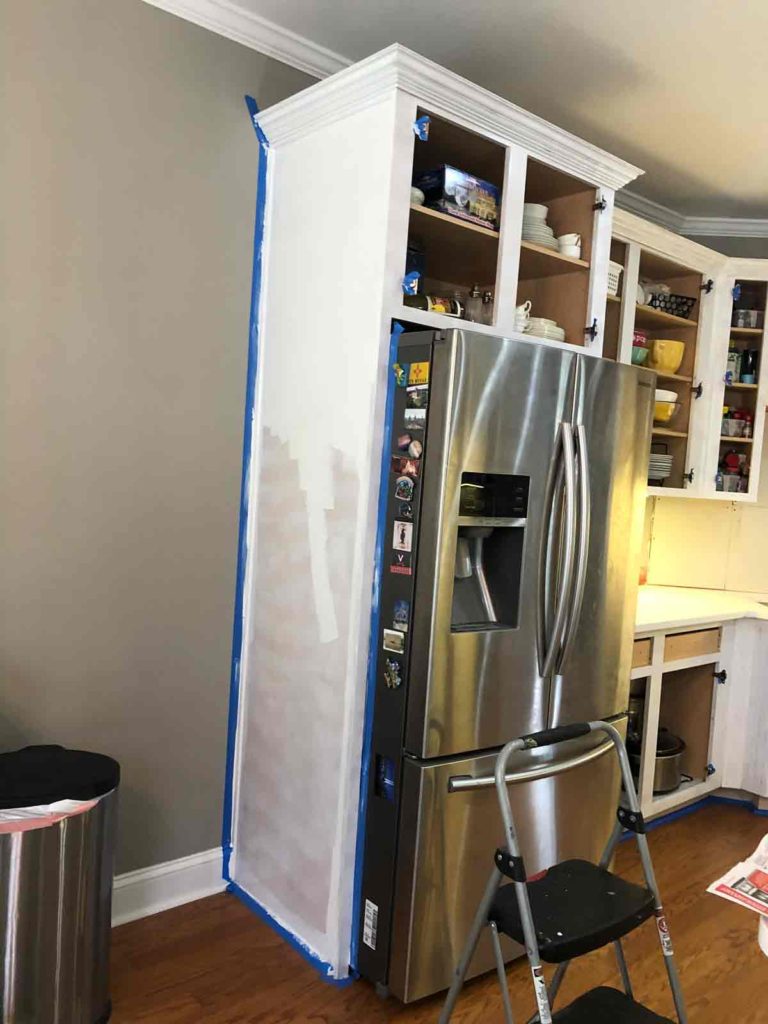
Tape and Clean
I also used the painter’s tape to cover the remaining hardware on the cabinet bases as well as where the cabinetry met the wall. I then cleaned the cabinet bases.
Because I had already purchased the Rustoleum kit I used their included deglosser to clean my cabinets but you could use any cleaner that would cut the grease. I cleaned them with the deglosser, then wiped them down with a damp sponge to remove any cleaner residue and made sure they were dry before proceeding.
Sand and Wipe Down
After cleaning I lightly sanded the cabinets with 220 grit sandpaper, then wiped them down with a damp paper towel and then again with tack cloth to ensure they were completely clean.
I may have gone a bit overboard with the prep work but it was insanely important to me that they looked professional when finished and everything I read said the preparation was a huge factor in the final result.

Paint, Paint, and Paint!
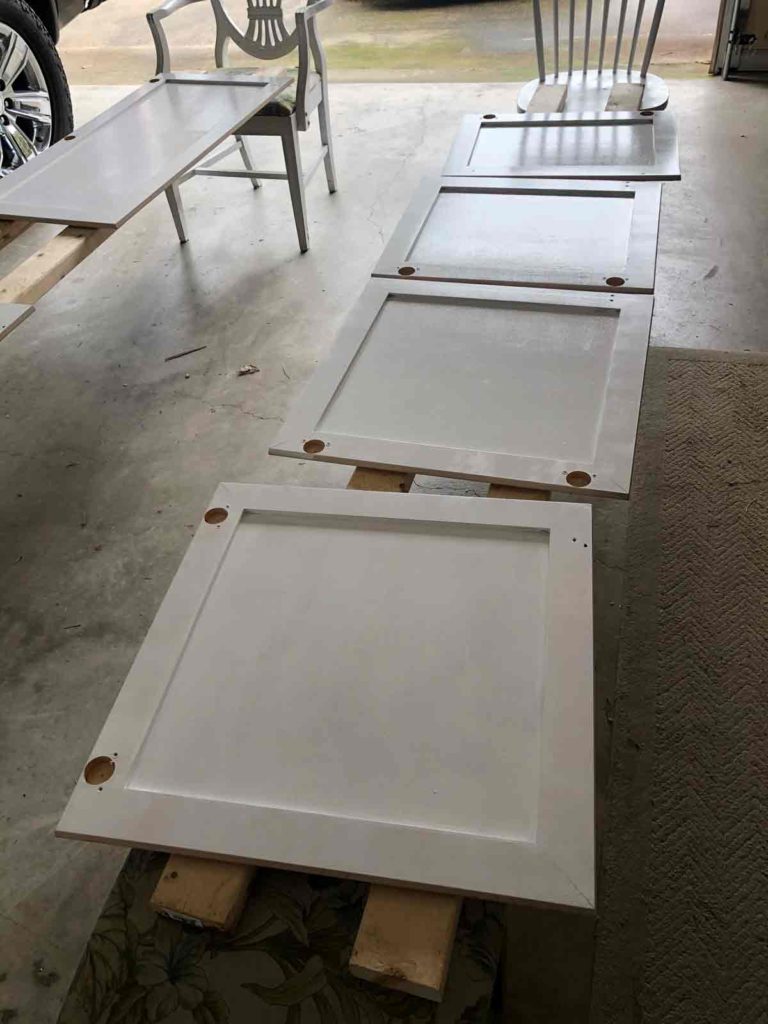
The painting of the cabinet bases was fairly quick but the process of painting all the doors and drawer fronts was significant. I used a small brush for detail work and a foam roller for the majority, as was recommended to me by my local hardware store for the best finish.
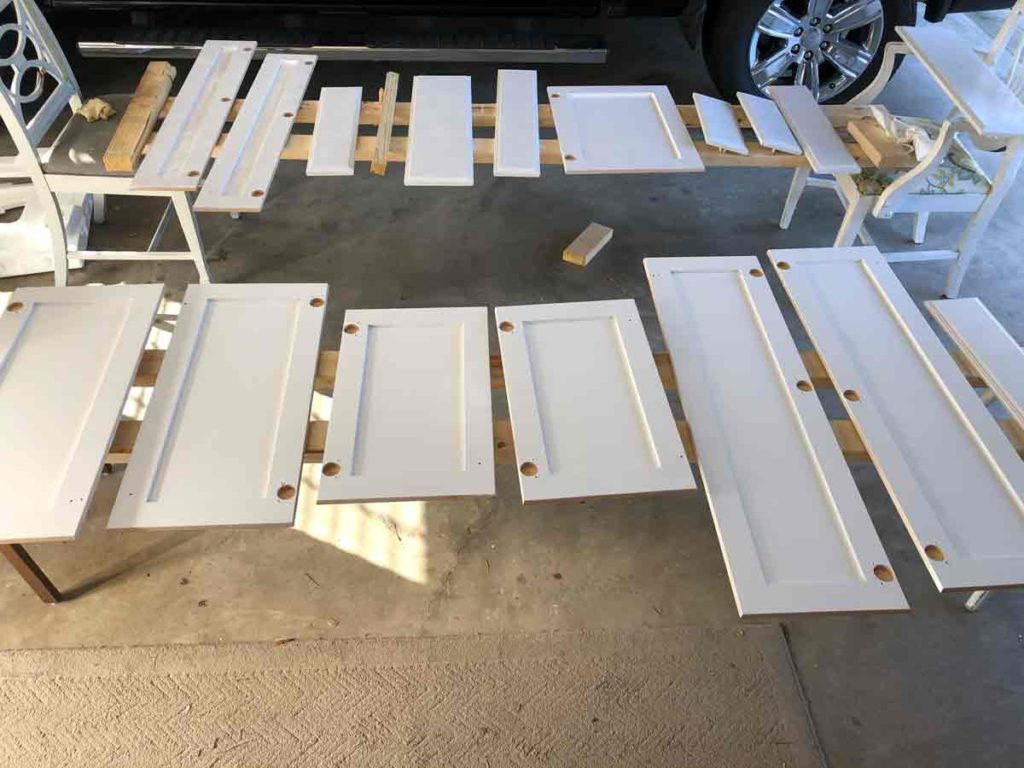
I set up a work station in my garage for the doors and drawers. I used pieces of wood and chairs to set up a rack of sorts to paint the doors and drawer fronts. I did 2 coats of paint on both the fronts and back so the entire process took me about 5 days because I could only work on so many at a time.
Helpful hint: Store your paint tray and brush/foam roller in the refrigerator between coats to keep it from getting hard and ensure you don’t have to constantly clean them!
The paint had great coverage and I can’t tell you how relieved I was that it looked so good!
Reinstall Doors & Drawers and Hardware
Once everything was painted and dried we reinstalled the doors and drawer fonts and it was time to replace the hardware!

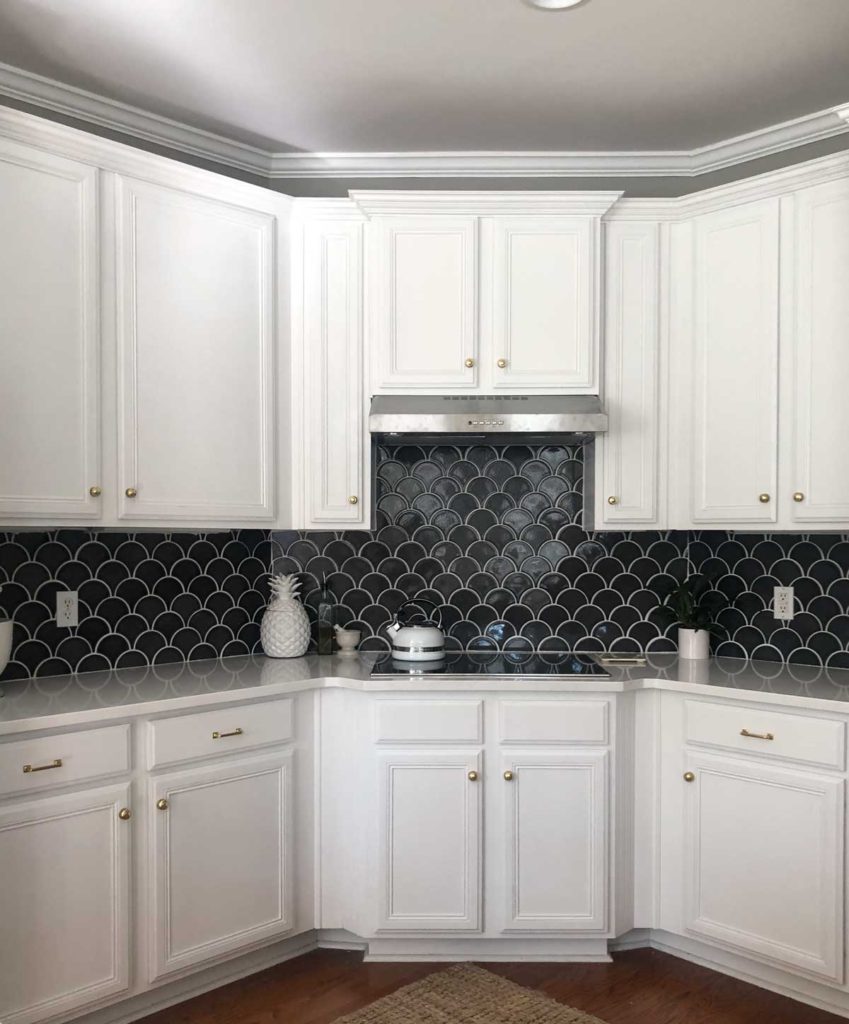
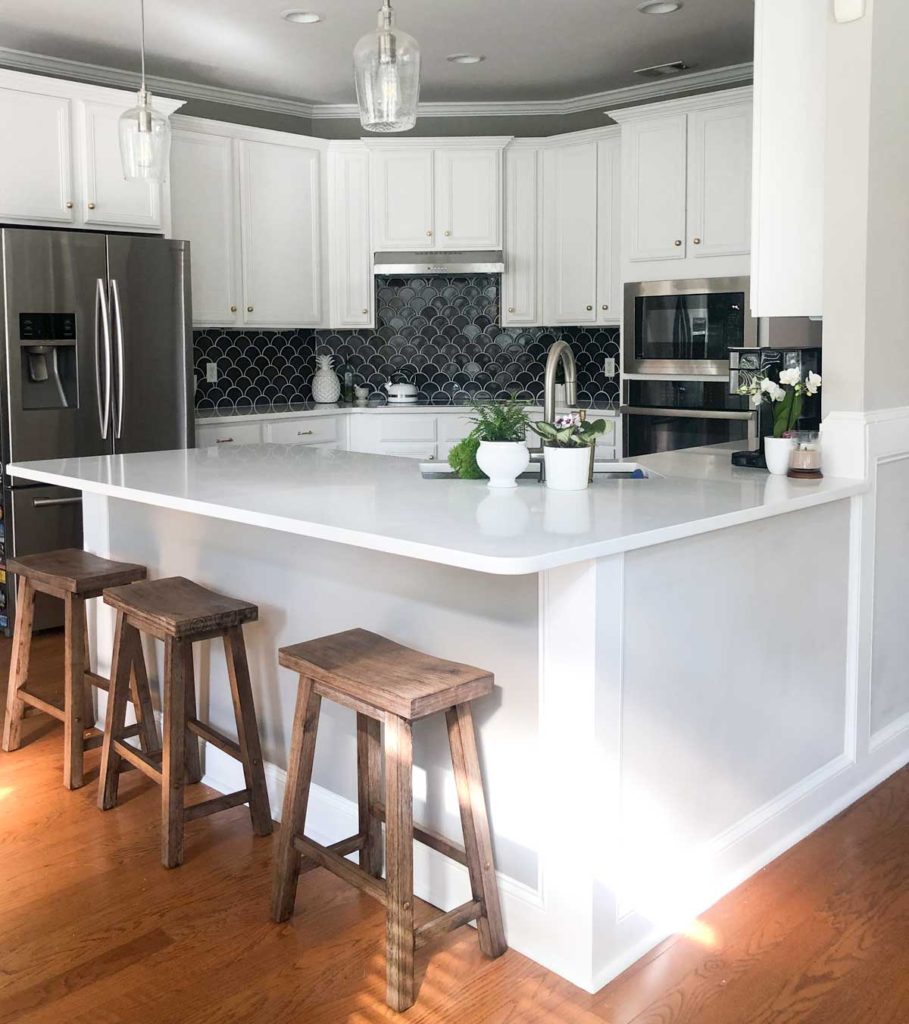
I did splurge on the new hardware because I was in love with it, I chose these Mission pulls and these cabinet knobs. I think they were the perfect finishing touch on the kitchen!!

While I can’t say I enjoyed the tedious process of painting the kitchen cabinets, I am SO glad I did it and regret not doing it sooner. It really made the kitchen transform in such a big way for a small price tag.
What do you think? Would you consider painting your cabinets?


Beautiful transformation! Thanks for the videos and inspiration!
Beautiful transformation! Thanks for the videos and inspiration!