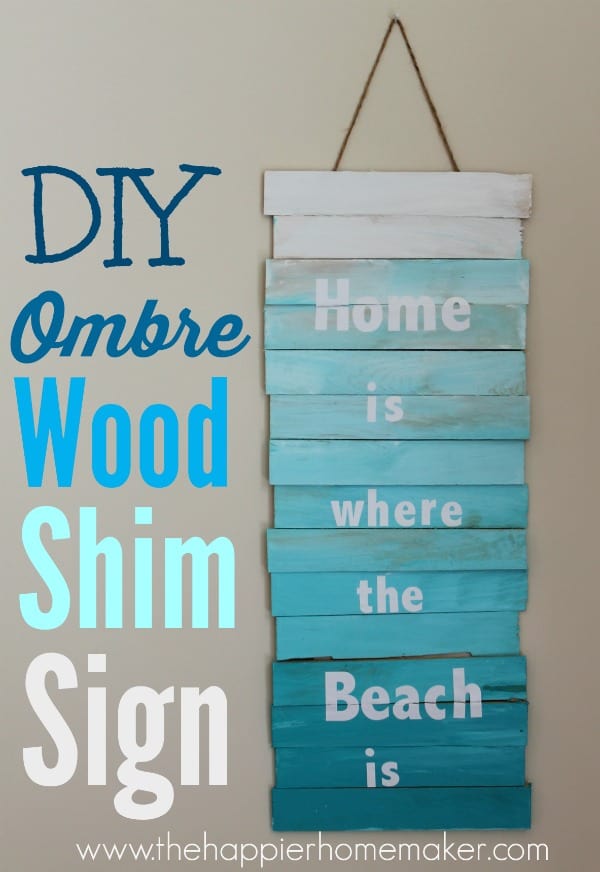
Just over a week ago we went to Virginia Beach to celebrate my middle son’s birthday with family…I grew up between there and Charleston, SC and it was nice to go back and visit and be near the beach again! When I got home I was inspired to make this easy DIY wood shim sign and share the tutorial with you!
 Supplies:
- wood shims
- Glidden® paint in White on White and Marine Blue
- paintbrush
- scrap fabric slightly smaller than finished sign dimensions
- hot glue and glue gun
- white vinyl
- Silhouette cutting machine
- 8″ jute twine
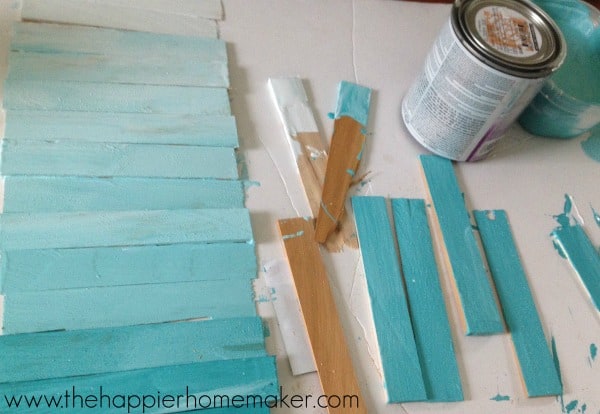
In a small disposable container add a few tablespoons of white paint and a few drops of blue and paint a wood shim. Continue adding blue a little at a time and painting shims until you have reached almost full saturation of blue. Paint at least 15 shims, I painted some extra as well so that I could find just the right progression for my ombre sign.
Allow the shims to dry fully and arrange 15 shims from lightest to darkest.
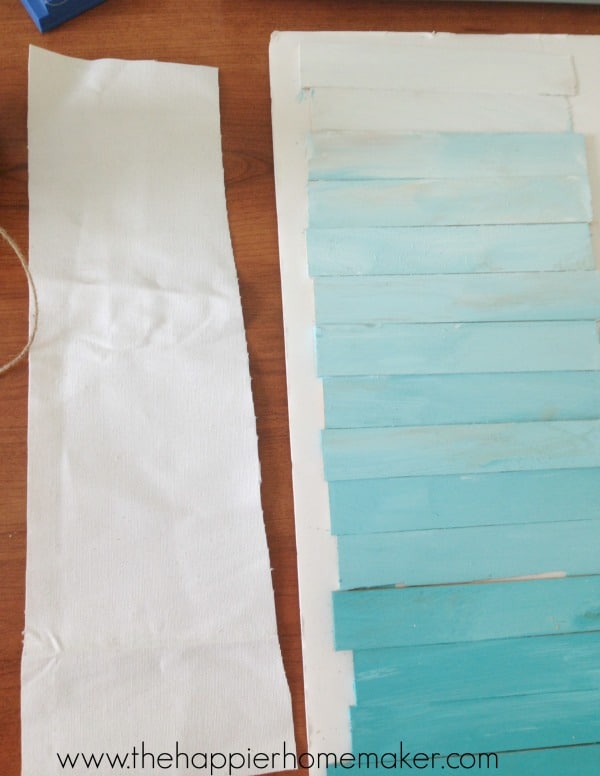
Cut your scrap fabric slightly smaller than your finished sign dimensions.
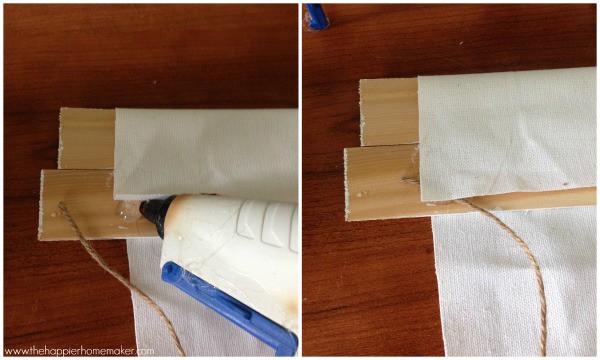
Glue the fabric to the back of your top shim, placing the ends of the jute twine between the wood and fabric as shown.
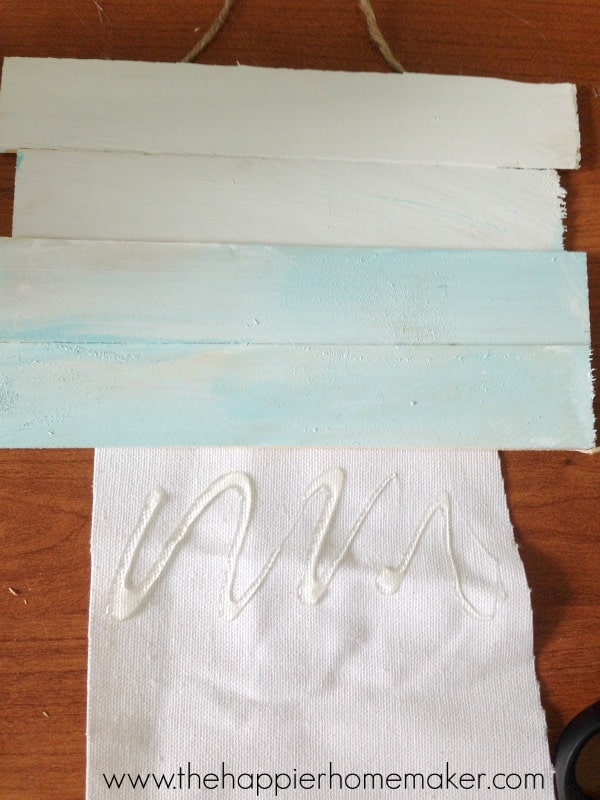
Continue gluing your shims to the fabric being careful to position them snug against one another to minimize fabric show through. I glued mine two at a time.
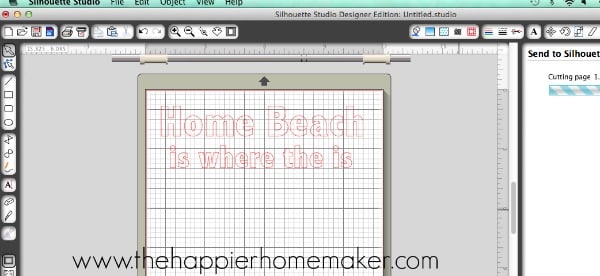
Use the Silhouette design software to create your letters. I made “home” and “beach” slightly larger than the other words. If you don’t have a Silhouette you could always purchase precut vinyl lettering.
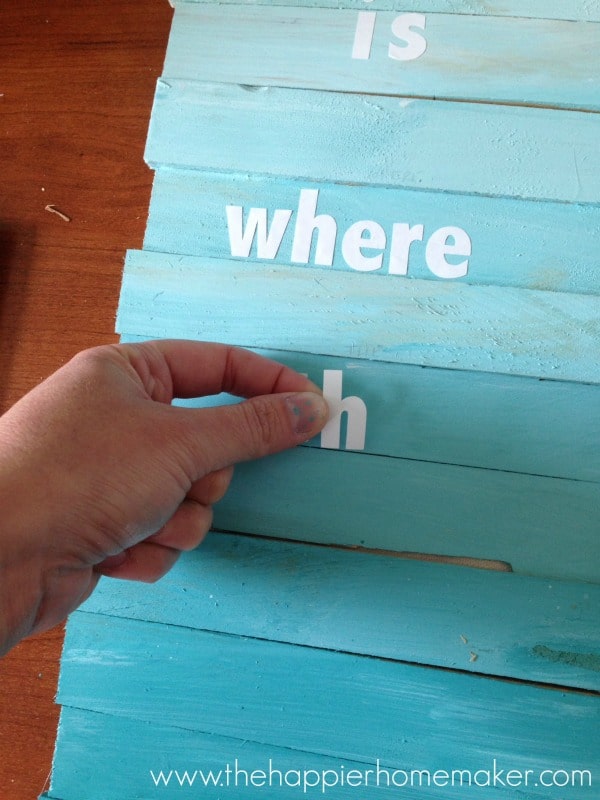
Adhere the vinyl lettering to the wood, pressing down firmly.
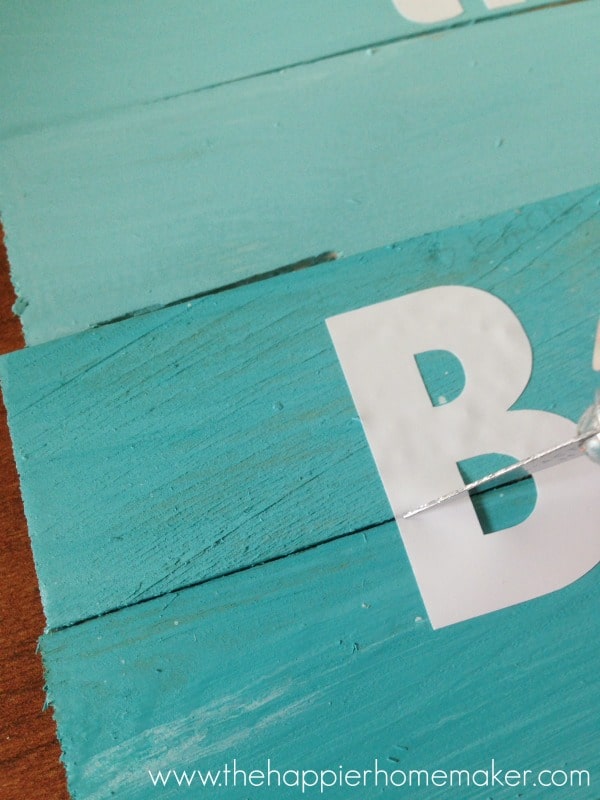
If your letters go over the space between two shims use a craft knife to carefully cut the letter over the crack.
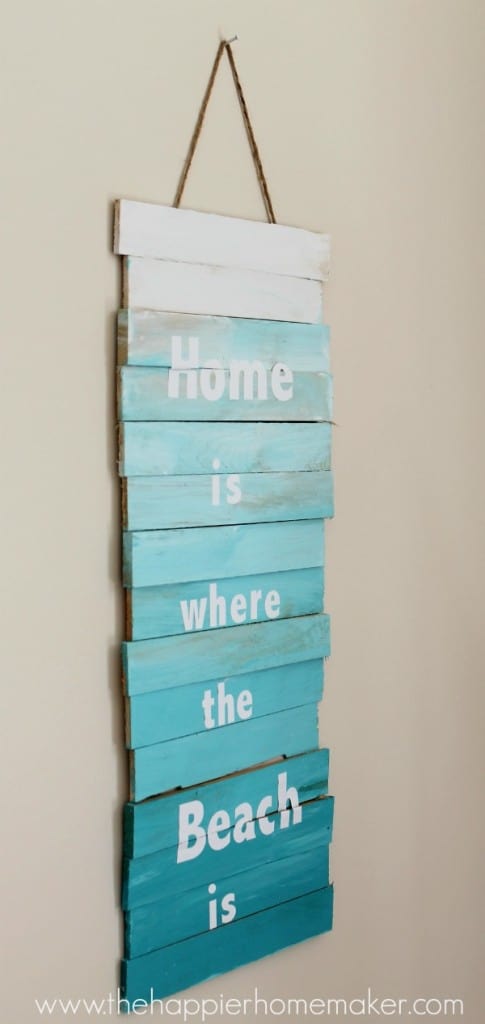
That’s it! I am in love with my finished sign, aren’t the colors gorgeous?


I love it! Glad you were able to visit back home in my neck of the woods… uh… beach… for a bit! 😉 Pinned it and will share later today on my FB page.
I’m not sure which I love more the ombre or the saying. So adorable!
I love this! I painted the words on instead of formed letters.
It turned out great. This is a present to my friend who has a
house at the Jersey shore. She will love this!
Thanks for sharing. PS. This is my first ombré project.
How fun!
Love this ombre effect, Melissa! So many pretty shades of blue 🙂
Great project – LOVE the color!!! Can’t wait to make one of my own. However, I was wondering about the placement of your shims. All the shims I’ve ever seen are wedge shaped, so I wondered – did you alternate the shims and place the thicker end of the wedge on the left, then the next one on the right? Or did you do it randomly? Or all the thicker ends to one side? Or is it possible that you’re shims are not wedge shaped? Thanks for the great project!
I did it randomly
I really have to make one of these for my college roommate who just bought a beach place. It’s in great colors too. Beautiful work!
Let me know if you make one Megan, I’d love to see a picture!!
Stopping by from Creativity Unleashed Link Party. So happy I came across this today. I needed some inspiration and motivation to make a sign for my wall gallery, after seeing this and how easy you made it look, I’m doing it. Thanks for sharing!
Thanks so much for stopping by Melinda!!
Think there will be a few of these signs made. We used to live on a big lake in MT and before MT used to live inland from San Diego and were at the beach as much as possible. We have a small state park lake here (CO) and I’d be there much more if I could afford the pass for seniors. But none the less, I should say” the beach is where my heart is”, little play on your words. Or My heart is where the water is. The CO river goes thru heading west about 2 miles south of us. We live few miles west of Grand Junction, CO.
I love how you did the blue with white on your sign and backed with the canvas fabric. I’ve yet to do an ombre project, just might have to do that after seeing your sign. Glad you shared a great post. Happy summer/weekend days
That’s great JaneEllen!!
So beachy pretty!
Thanks Heather!!
It really is fantastic the perfect time to come up with a few options money for hard times which is the perfect time to feel very special. I’ve got learn that placed of course, if I possibly could I must propose an individual number of attention-grabbing items or maybe guidance. You may create subsequent posts discussing this article. I wish to get more information difficulties approximately the idea!
Thanks!