
DIY Faux Marble Counter

Fake a marble countertop with this easy to follow DIY tutorial! Perfect for displays & tabletops, this project takes less than 30 minutes and costs less than $20!
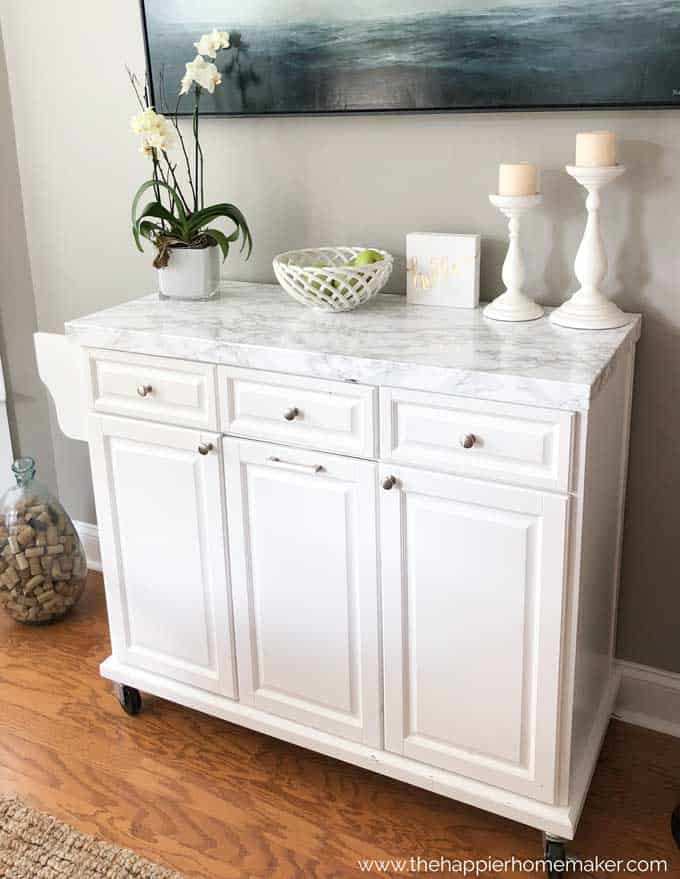
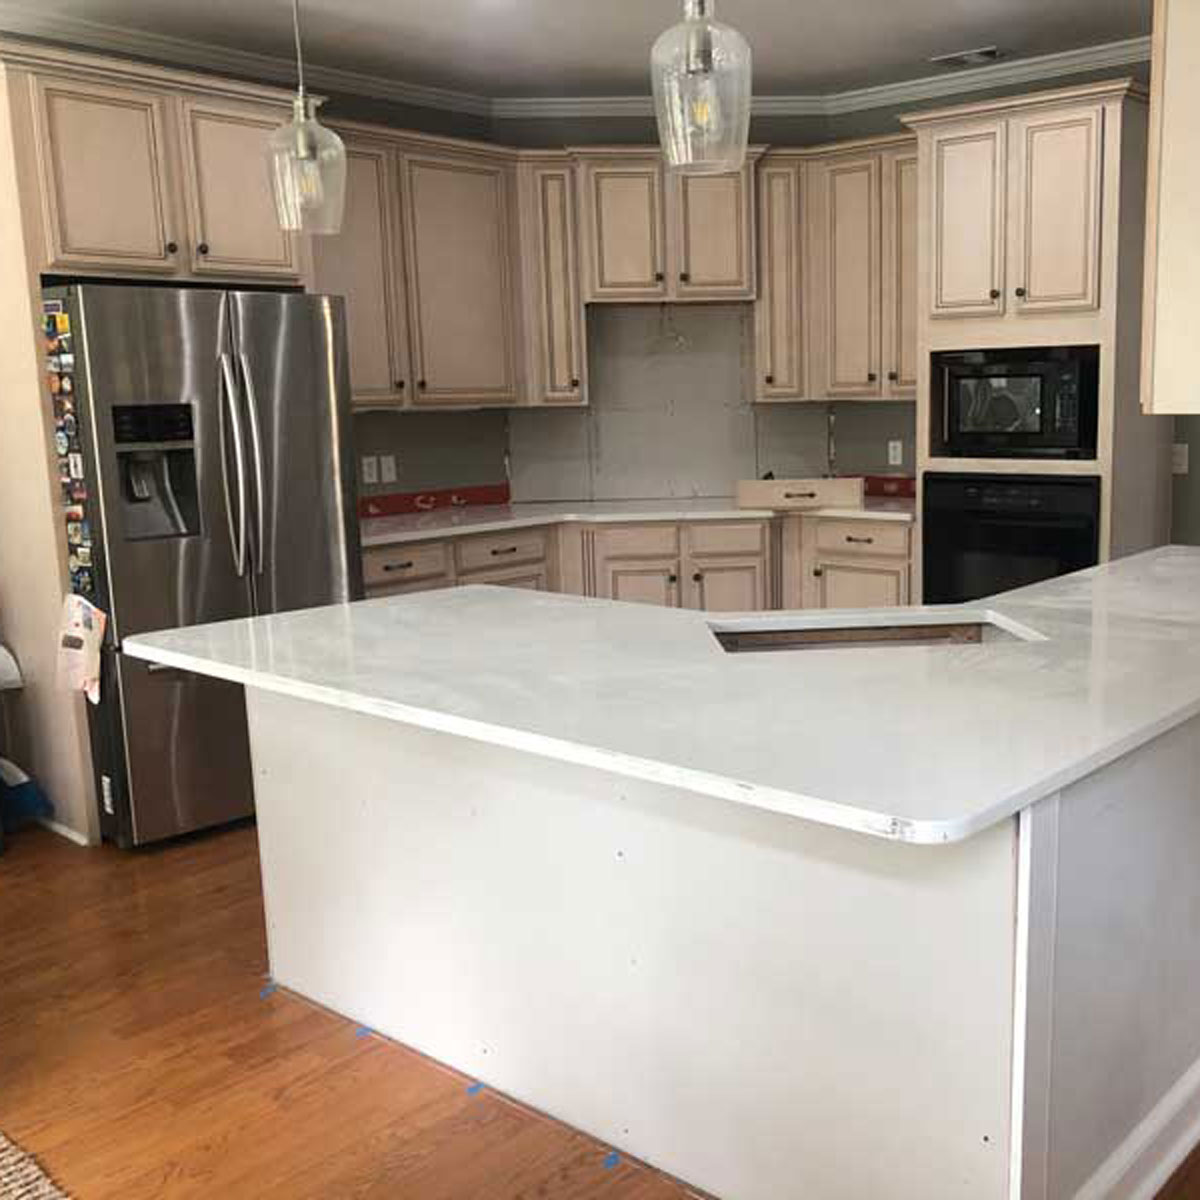
A few weeks ago I shared a picture of the eat-in area of our kitchen on Instagram because I felt it looked a little to dark or heavy at one end of the room and wanted suggestions. Today I’m super excited to show you how we updated an old kitchen island we had with an easy DIY Faux Marble Countertop and how much it helped lighten up the room!
I guess I had mentioned the “too dark” thing a time too many to my husband because in the middle of me cooking dinner one day he started emptying out the server and told me it was time to move it.
I desperately tried to convince him that no, it was not time to move one of our largest pieces of furniture in the middle of dinner and kid’s homework time but the man is relentless.
And his idea of what to put in its place? This kitchen island on wheels I used to keep in my old craft room that was currently serving as a catch-all storage piece in our laundry room.
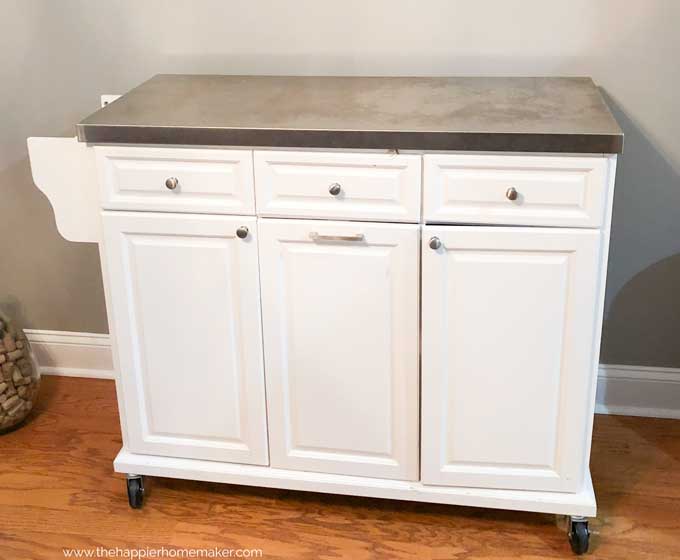
I was not at all enthused about that stainless steel top until I had the idea to disguise it with marble contact paper I keep in my office to use as a photo backdrop sometimes. Now it was my husband’s turn to be less than enthusiastic!?
Click here for the exact contact paper I used for this project. (affiliate link)
How to cover a counter with marble contact paper
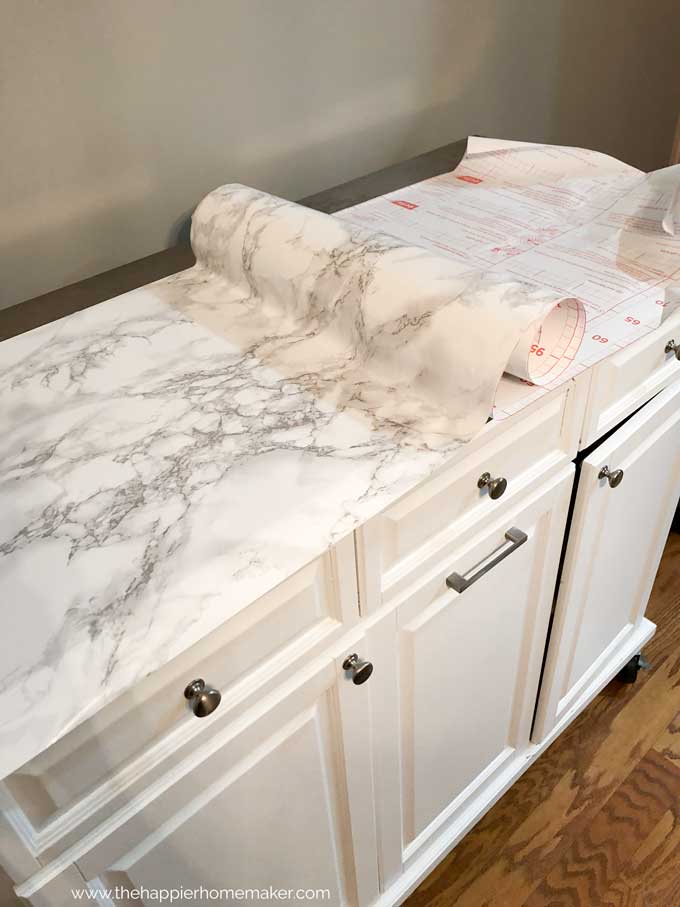
My contact paper was not as wide as the counter on this island so I decided to put the line in the back knowing that I would have various decor items set back there to hopefully disguise it.
I lined up the edge of the paper as closely as possible to the bottom front lip of the counter, erring on the side of too much rather than too little and slowly began to peel it off the backing while pressing on it with my forearm to apply it as smoothly as possible.
I’m not going to lie, it wasn’t perfect. I did the best I could to work out any major bubbles and prevent wrinkles but it does have some imperfections, luckily the pattern makes them hard to see unless you’re looking for them and the light is just right.
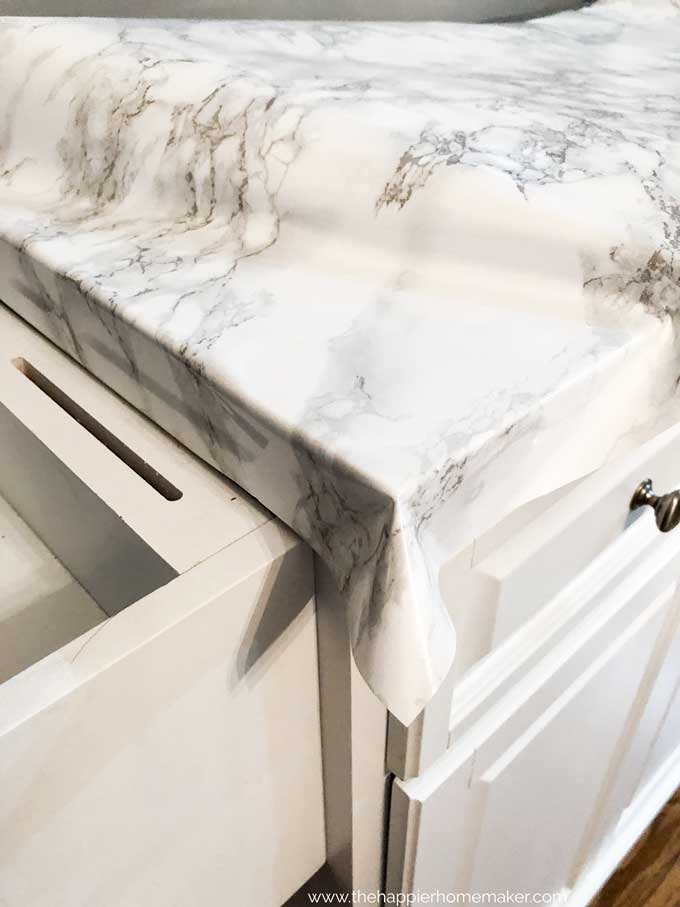
At the corners I cut the paper on the back side and carefully folded the front around. The big takeaway here is that it’s not perfect but it works well enough, even in this space that is used a ton in our house.

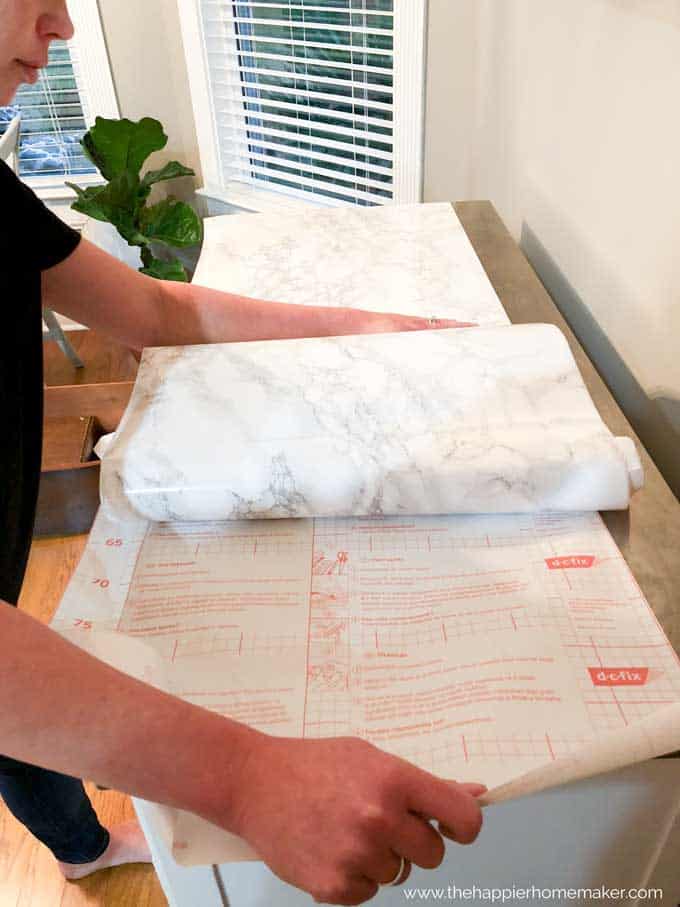
I repeated the process on the back with a thinner piece of contact paper. I tried to line up the patterns to make the transition as seamless as possible. Even my husband had to admit when I finished that he couldn’t tell that it was fake and he was impressed. (And yes, dinner was totally cold by time we finished this process!)
Click here for the contact paper I used for this project. (affiliate link)
The finished result
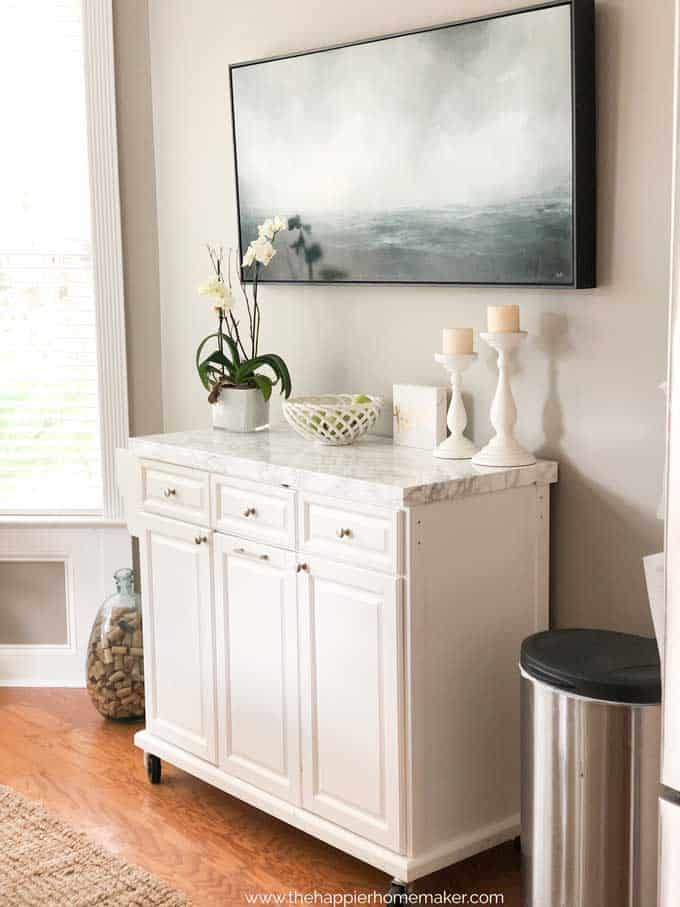
I couldn’t be happier with the way it turned out! We also switched out the artwork above with this piece by Adam Hall from Robert Lange Studios in Charleston (one of our favorite galleries we try to visit often!) I love having it here where I can see it every day!
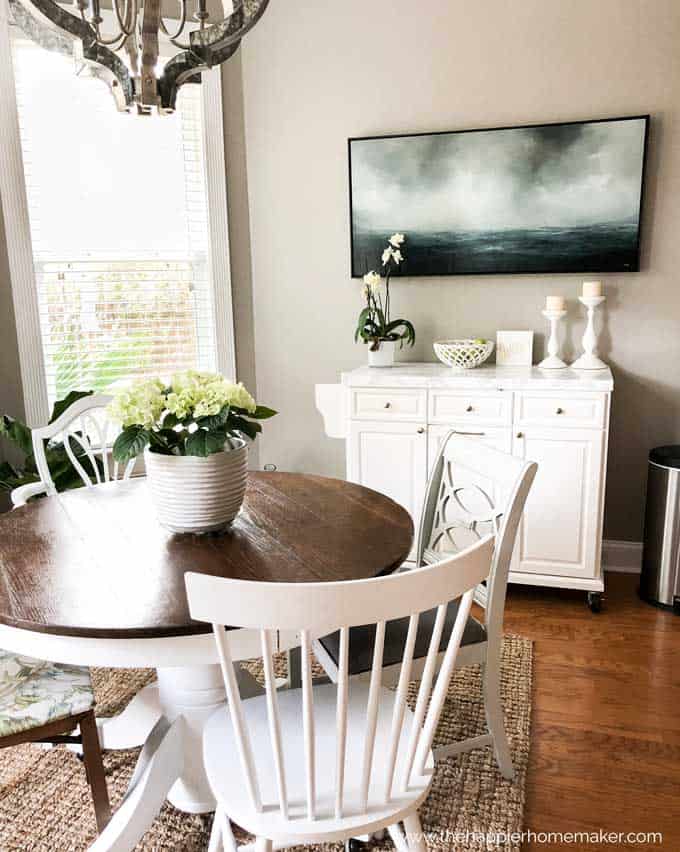
So what do you think of the lightened up space? Would you try this DIY Faux Marble Counter in your home? I definitely don’t regret it for this space, but it works here because it’s a display area rather than a functional countertop. I love it though!
Update: Year 8
Eight years later and this fake marble counter is holding up great!!
Click here for the contact paper I used for this project. (affiliate link)


Looks great. I might try this for my craft room table…
It’s crazy how good it looks in person, I’ve had multiple people comment on it not realizing it isn’t marble! ~Melissa
What do you think about putting poly over it? I want to do my kitchen cabinets.
It looks great! If you are looking to brighten the room a bit more, you might want to replace the dark artwork. Just a suggestion!
Hi
I.m sick of my blue work tops in kitchen. Cant afford a new kitchen. I really like this idea. Is it just marble though?
Hi do you have a link for the contact paper you used??
This is the one I used here
The brand of contact paper used is not visible. Thx
??…………???
That looks gorgeous! I also covered up for my shelves with a different pattern but yours looks great!
I have worked with vinyl for many years and here are a few tips that can help tons when laying any kind of vinyl. First you should make sure the surface is clean and free of any oil residue. Second – I use a spray bottle – put in about 2-3 cups of water, 3-4 drops dawn or joy dish soap and 1/2 cup of alcohol (do not use denatured alcohol) in the bottle and spray a thin, even coat of this on the surface you are putting the vinyl on. This will allow you to move the vinyl for 2 to 3 minutes before the fluid starts to evaporate and the vinyl adheres to the surface. Durring the setting time you want to use a squigie (can be a credit card for smaller surfaces, I also put a thin micro-fiber cloth over the squigie so you dont tear the vinyl if using thiner contact paper. Lastly if their are any small air bubbles left they can be removed with a small pin or needle and poke the hole and s-l-o-w-l-y work the air out of the hole being carefull not to strech the vinly out of shape.
Try this method for the stickers you get for your car window and you won’t have to worry about getting it on straight the first time, now you have a little tweeking room.
My counter is curved…hate to put seams at the sink but it’s the only place I could and it would be less conspicuous. How would I do corners & edges?
I did this with the tops of my radiator covers.
great idea, how did it hold up?
Much, much better now. Thank you for sharing your work and inspiring me.