
DIY Summer Sunflower Wreath
Today I have an easy DIY summer sunflower wreath tutorial!
I love this wreath because it’s so bright and cheerful and you’re going to love it too because it’s just so easy to put together (and not expensive!!)
Supplies
First we’ll need to gather your supplies. You will need:
- grapevine wreath
- burlap garland
- one bunch of faux sunflowers
- a wooden letter
- hot glue
- floral wire
All of these things can be found at your local craft store. If space or budget is an issue you can find very affordable mini glue guns that are worth their weight in crafting gold!! (Don’t forget to always check for coupons before heading to the craft stores! Most stores even let you pull them up on your smart phone at the register!)
Step by step
First, cut your sunflowers apart so you have multiple single flowers on stems. Once they are separated begin tucking your flowers into the grapevine wreath using the vines to secure them. Continue adding the flowers until they are all on the wreath and positioned how you like.
By the way, the reason I like to add my flowers to the wreath this way is because when you live in small spaces you don’t have room to store multiple wreaths for each season. By tucking my flowers into the vines to attach them I can easily take the flowers off when it is time to switch out my decor. Then I just store them until next summer! This way you can use one wreath all year just by switching out the accessories!
Next up is the bow. Cut a few feet of burlap garland off and start towards the middle by creating a loop half the size you want your bow. Holding that loop with one hand create another loop for the other side of your bow. Continue holding in the middle, secure the two loops with some floral wire. If you don’t have floral wire you can also use string or even a garbage twist tie! Cut another small piece of burlap and roll the ends together and secure with hot glue to hide the edges. Wrap this piece of rolled burlap around the center of your bow and trim the ends to the desired length.
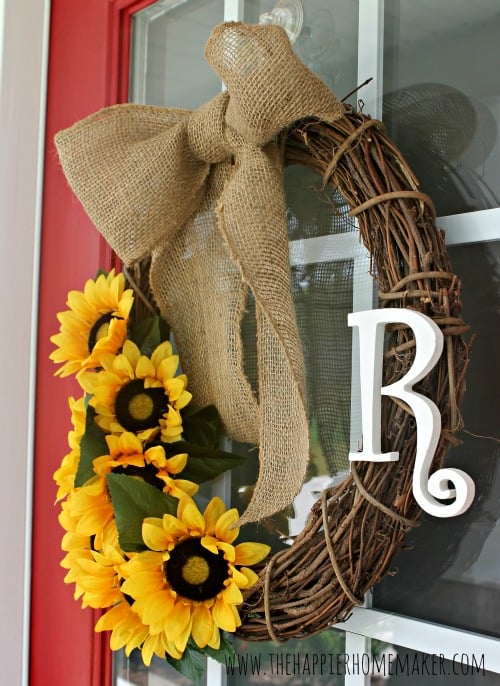
Now let’s finish putting the wreath together. I bought a primed white “R’ for my wreath and decided not to paint it but if your wooden letter needs painting of you’d like it another color go ahead and paint it before attaching it to your wreath. I use hot glue to attach both my bow and my wood letter to my wreath. If you use the glue sparingly it is very easy to gently peel off when you want to change up your wreath next season.
To hang my wreath I like to use a small piece of string or twine tied on the back of my grapevine wreath as a hanger. My front door has glass so I use a suction cup hook but I highly recommend command strips if you don’t have glass on your door-they hold so well and remove easily so there is no damage.


Congratulations girl! You are going to rock this! And your wreath – ADORABLE!!!!
Thanks Jacque!
Wahoo! Congrats! Love your sunny sunflower wreath too! Now I want sunflowers…
Love your wreath! Sunflowers will carry you right into late summer and early fall! And congrats on your new gig!
Thank you Jane!
Congratulations!! Love the wreath!! Thanks for showing how to tie a perfect bow!!
Thank you Crystal!
CONGRATULATIONS! That is awesome! And that wreath is adorable.
Congratulations!!! How fun, I can’t wait to see check it out. I don’t live in an apartment, but I have a really small house. Hugs, marty
I Just wanted to say thank you for the idea!!!!! I remade this wreath and took my own spin on it and it was beautiful!!!!
That’s awesome Dominique! Thanks for taking the time to let me know (and I’d love to see a picture if you have one!)