
DIY Iced Branches
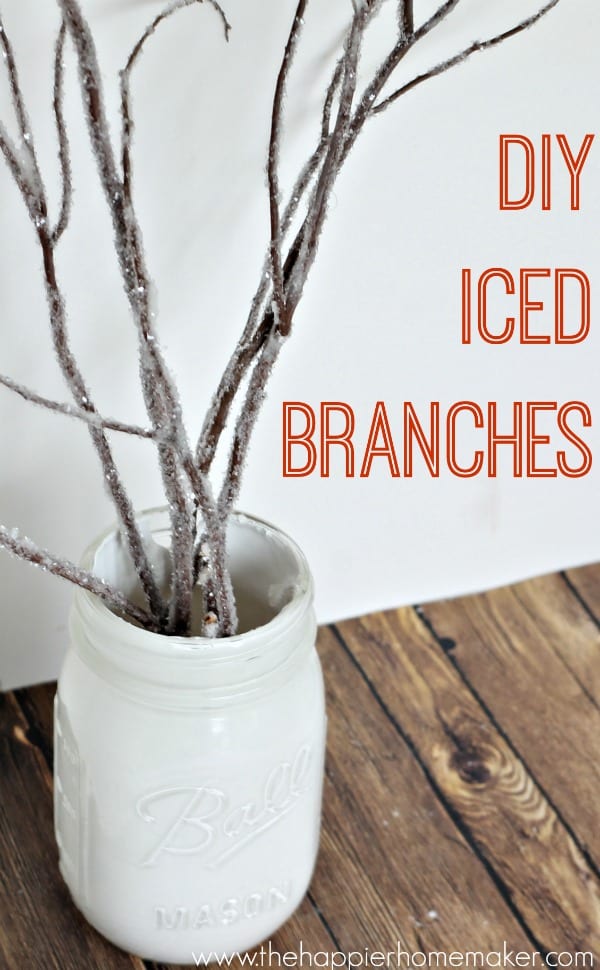
Want an easy and super fast holiday decor craft? Well lucky you because today I’m sharing how to make your own DIY Iced Branches! I’m so happy with how these turned out and it was one of the fastest DIYs I’ve done in a long time!
Supplies:
branches
craft paste
diamond dust (ground glass glitter)
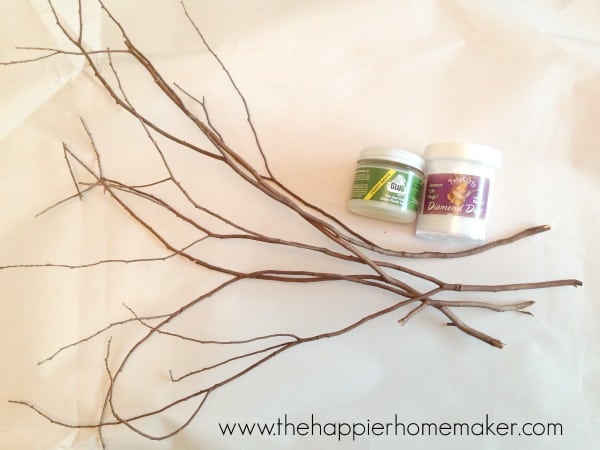
I ordered my Diamond Dust from Save on Crafts when I ordered the supplies for my Autumn Mantel. The paste I used is an awesome new product that was sent to me to try a while back-it’s called Glu6 and it’s made from recycled styrofoam-very cool (and it smells awesome!) {Those aren’t sponsored or affiliate links just sharing my sources!}
Cover your work area with paper to catch the glitter. To start your iced branches coat the branches with paste. I found the easiest method to be putting paste between two fingers and manually coating the branches starting at the ends and working down, working in sections so the glue didn’t dry before I added the glitter.
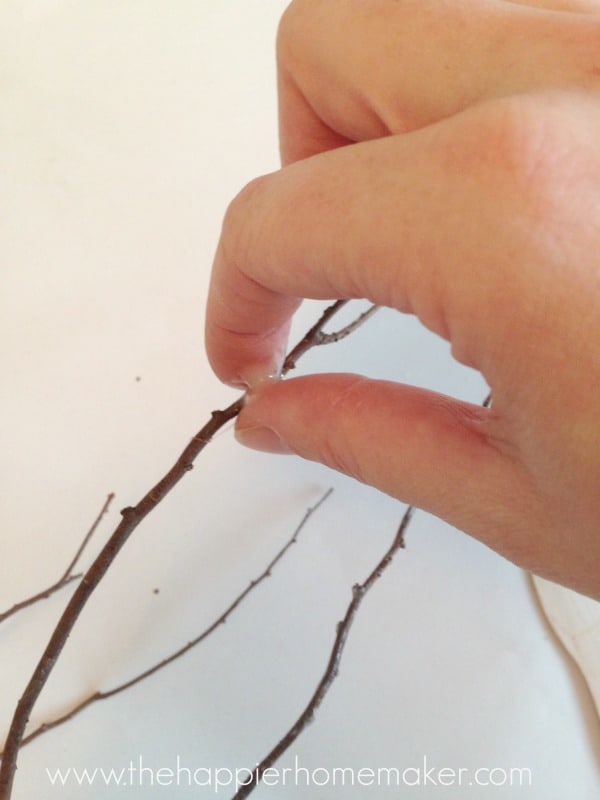
Add a good amount of glue on the branch (not globs of it but a thick coat to give the glitter something to “hold” to). Pour the glitter over the branches or alternatively pour the glitter on the paper and dip the branches. Tap excess glitter off branches and allow to dry 4-6 hours.

Done! See, I told you it was fast!
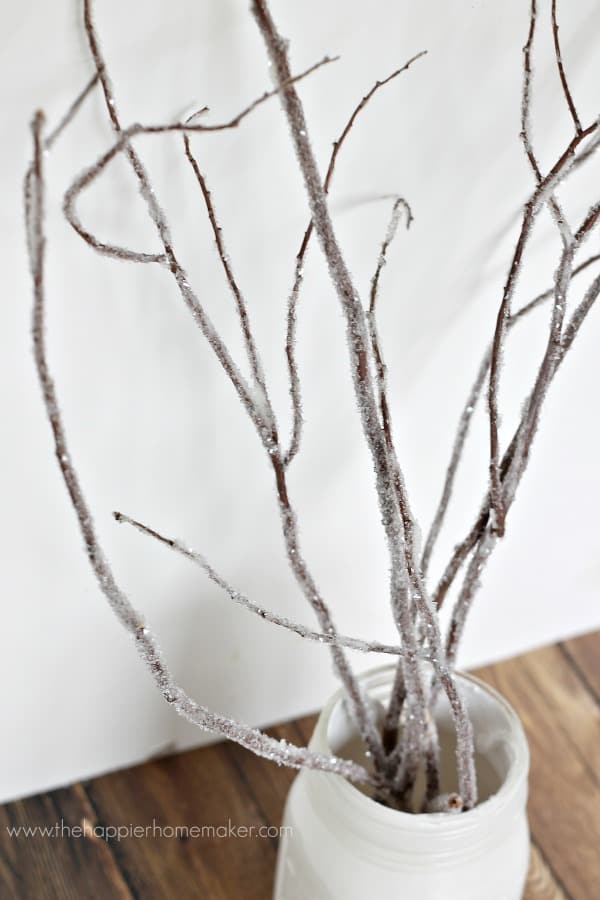
Are you going to ice some branches this winter? I think even my boys could pull this DIY off!


That looks great! Are you finding that the glitter is flaking off at all?
I tapped them off pretty well before using them and the only time I’ve noticed glitter coming off is when I accidentally bumped one on something.
Those so super pretty! What a fantastic idea!
Thanks Gwen!!
The branches turned out great. Those things are really expensive in the store.
Oh I love it, they turned out fabulous! Pinning!
So pretty and I just so happen to have tons of branches outside waiting for me to rake them up! Much rather make them look pretty!
These are awesome! They are always expensive to buy too! Thanks!
think I might try adding some silver n blue branches as well. not sure about blue, but all 3 are classic winter scene colors. thanks for the idea 🙂
Super smart idea you have there and I love the end result! Just had to stop over and check out the blog after finding this post via Pinterest. New follower looking forward to reading more!
Thanks so much Trinity!
“glass glitter” kind of scares me. is it all irritating if it gets on your skin?
No Vanessa, it isn’t irritating. Hope that helps! ~Melissa
It turned out pretty! This is a great idea for Christmas decor. Thank you, Melissa