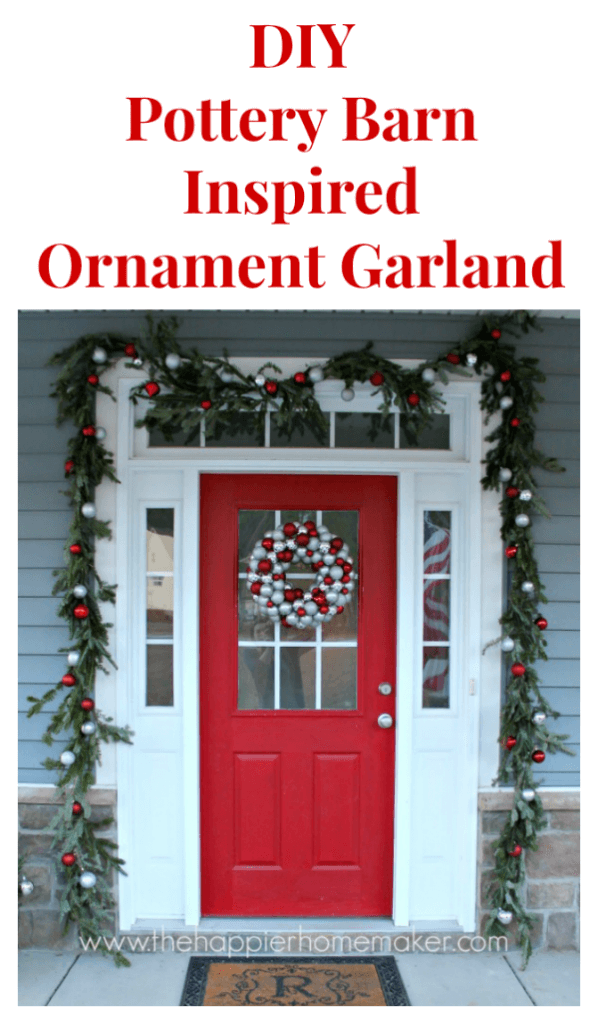
Months ago I was perusing catalogs, magazines, and Pinterest looking for inspiration for this year's holiday decor. I knew I wanted to keep the inside neutral but after last year's DIY magnolia garland and wreath I thought I'd like to try a little more color on the exterior.
I found an ornament garland at Pottery Barn that was decorated with red and silver ornaments and I knew that would be my inspiration-the red accents were perfect to compliment our red front door.
So why didn't I just buy the Pottery Barn version if it was such perfection you might ask...because I'm fickle. And I know that I won't want the same decor next year. So I decided to DIY my own version of it on the cheap.
I started out with high hopes-I was going to do the entire porch with the garland (it's a BIG porch!) I headed to my local home improvement store and bought a few rolls of fresh garland. When I got home I put it up and was faced with this sorry state:
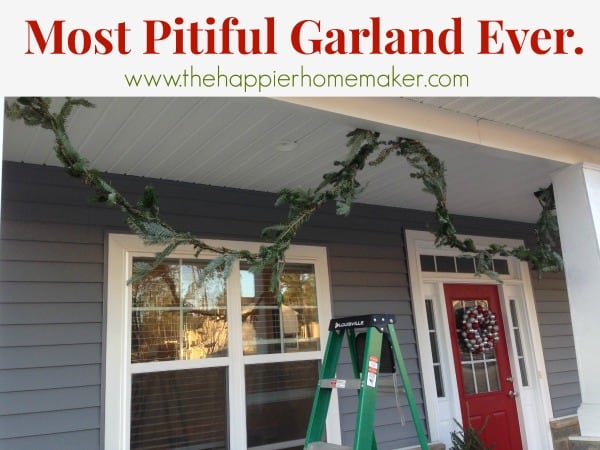
Seriously, is this not the most pitiful garland ever? I posted this on my Facebook page and y'all had me cracking up calling it the Charlie Brown garland!
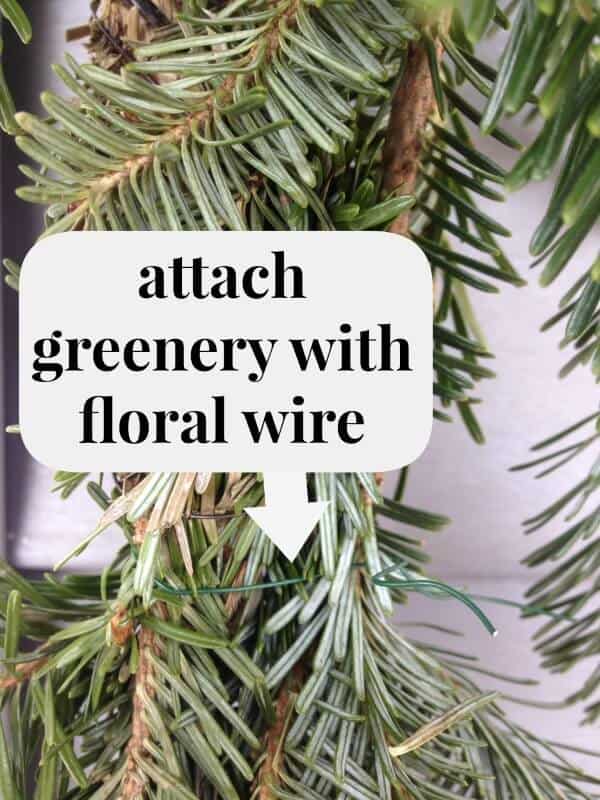
I ended up having to beef it up by taking apart some of the garlands to add the pieces to the others. Not so much fun. I even trimmed a few extra branches from the bottom of my Christmas tree to flesh it out. To add to the garland I used about 6" of floral wire to attach new branches to the existing garland.
(If you are making this to keep for the future and bought a healthy looking faux garland this entire thing would take about an hour-for me it was an all morning affair!)
On to the fun stuff...after the garland looked less anorexic I went ahead and hung it up-I only had enough for around the door at this point. I wanted to hang it before adding the ornaments so that I could step back and see the final product during the process.
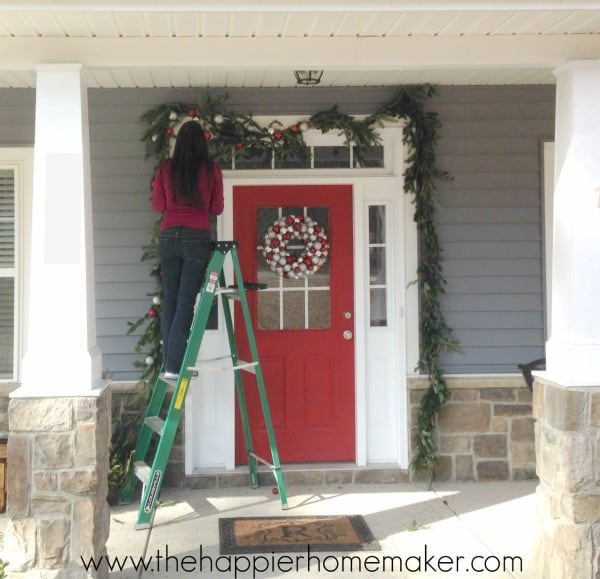
I began by gathering up a pile of plastic no-shatter silver and red ornaments I had left over from Christmases past and my DIY Ornament Wreath. Then I cut an enormous amount of 3-4" lengths of floral wire. I hung the ornaments mostly one at a time but added some clusters of two every so often. To hang I folded the floral wire into a "V" and threaded the ornament(s) then twisted the wire to keep the ornaments on. Then I would fasten the wire to various branches on the garland.
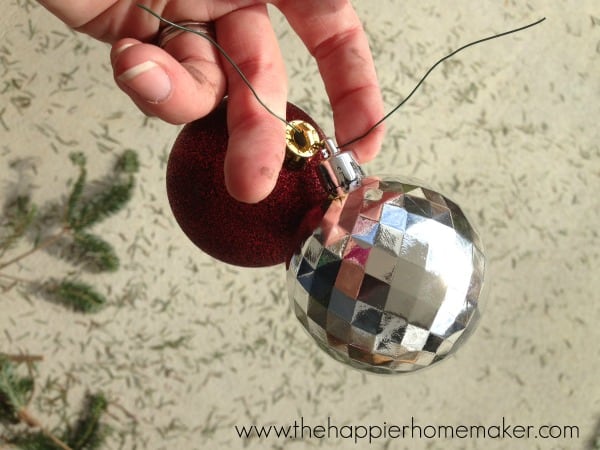
Can you see the insane amount of fir needles in the background? You have no idea what a pain it was to beef up that garland-seriously, buyer beware when purchasing live garland-unroll those suckers before taking them home to make sure you're getting your money's worth!
In the end it was definitely worth it-my garland cost me $33 total and the ornaments were all on hand so it was a pretty cheap project! What do you think?





Courtenay says
You know, I thought that garland looked rather Pottery Barny the first time I saw it! Great knock off!
Jocie@OPC The Better Half says
super pretty and love it with the wreath!
Melissa Riker says
Thanks so much Jocie!
HomeGoods says
Hi Melissa, we love this! We're all about getting the look you love for less. Very nicely done. Thanks for stopping by our link party. Happy Holidays! Your friends at HomeGoods
Melissa Riker says
Thanks so much HomeGoods!! Happy Holidays to you too!
Gwen says
So, so pretty, Melissa! I need to get mine up!
Jessi @ Practically Functional says
Love it! What a brilliant idea! Now I just need an actual front door to decorate. 🙂
Melissa Riker says
Thanks Jessi!!
Vanessa says
What a beautiful front porch!
Melissa Riker says
Thanks so much Vanessa!
Liz VanKirk says
How did you get the garland to stay up? Esp around the corners? Did you put a nail or hook in you new door frame?
Liz
Melissa Riker says
Hi Liz, I actually used floral wire to make a loop attached to the garland where I wanted it to attach to the door frame, then looped the wire around the sharp corner at the edge of the frame. There was no way I was poking a hole in the frame or siding to hang anything, I've used this method with a few garlands since we built the house and haven't yet had any problems with it!