
How to Make a Gift Bag

It’s so easy to learn how to make a DIY gift bag out of wrapping paper with this step by step tutorial!
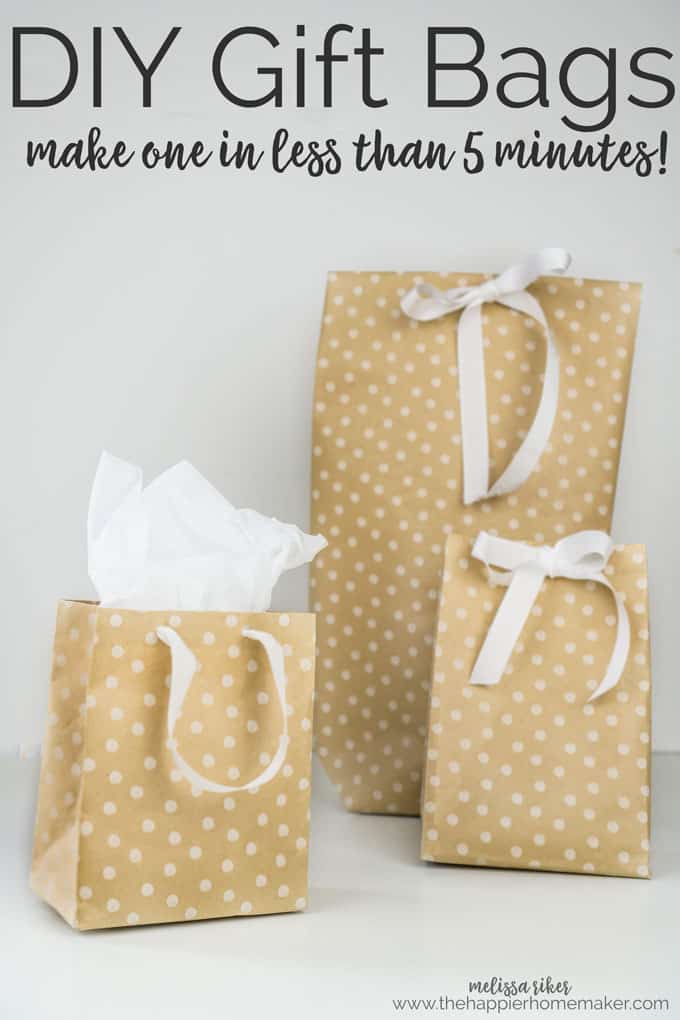
I share a lot of DIY gifts here on the website so it only seems right to make some DIY gift bags from wrapping paper as well! These bags are perfect for gifting when you don’t have a bag on hand and they are super easy to make in just a few simple steps.
While you’re at it download these printable Christmas gift tags too!
There are two different types of bags I’m going to show you how to make-the first is the fastest and it’s more or less a paper sack. It’s great for holding oddly shaped objects. The second is a more traditional looking gift bag that looks like those you’d find for sale in stores. Both are easy!
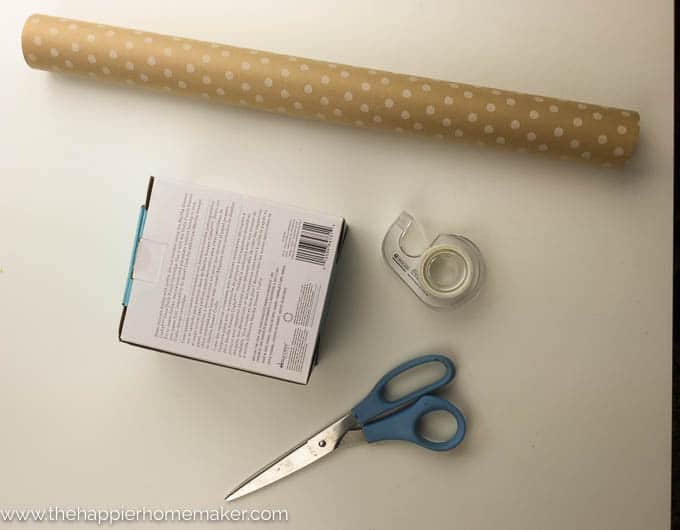
Supplies
- wrapping paper: choose a higher quality, thicker paper to give the bag strength
- invisible tape
- double sided adhesive (optional but very helpful)
Paper Sack Gift Bag
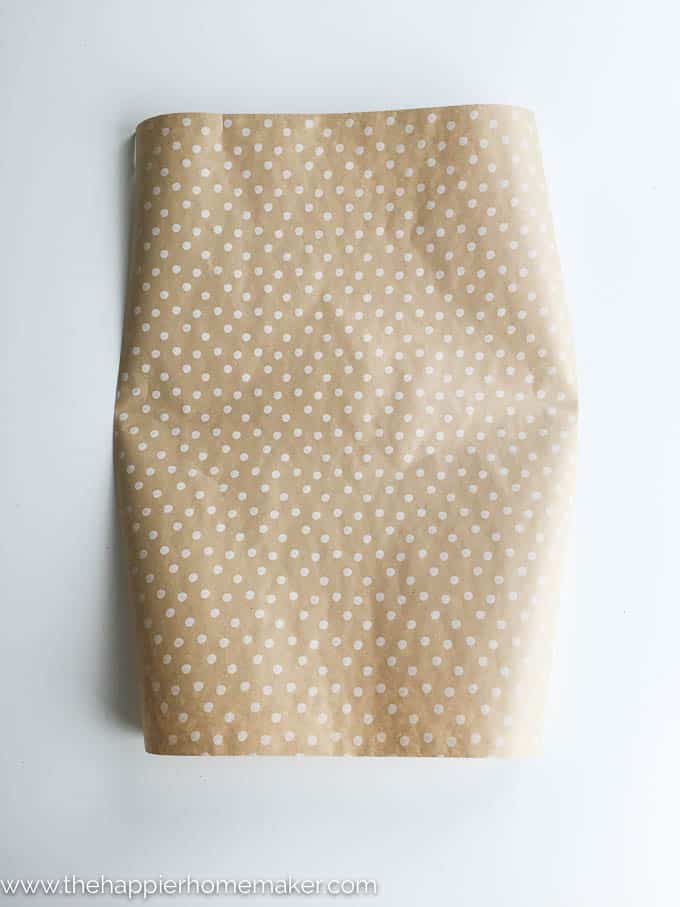
- Start out by cutting your wrapping paper big enough to fully cover whatever it is you’re wrapping.
- Lay the paper right side down and fold over each side to the center making sure there is a small overlap.
- Tape the paper (I totally forgot to do this in the next few pictures-sorry!)
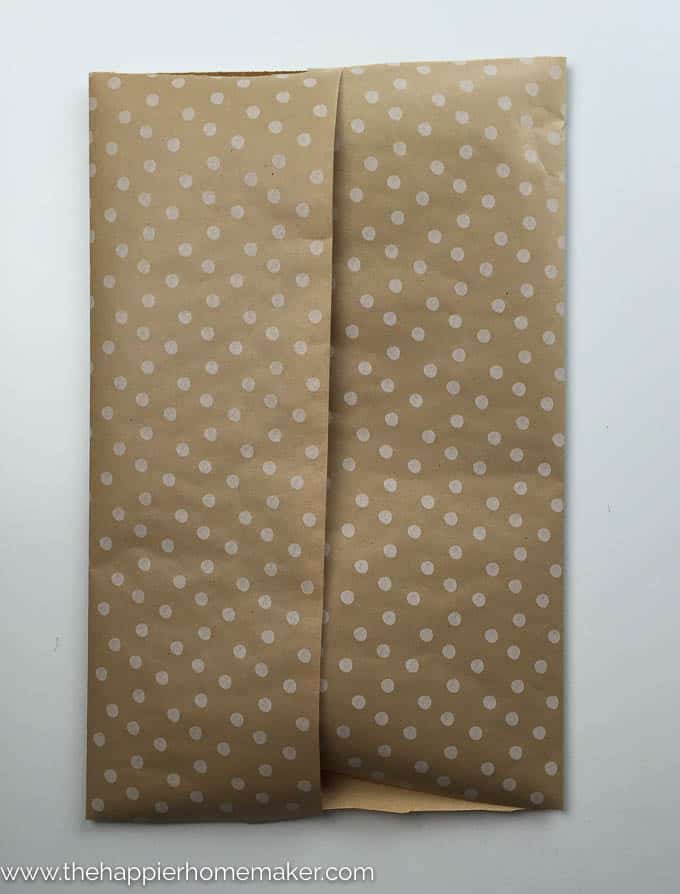
- Fold what will be the bottom of your bag up toward the top. Be sure to make it wide enough for your gift.
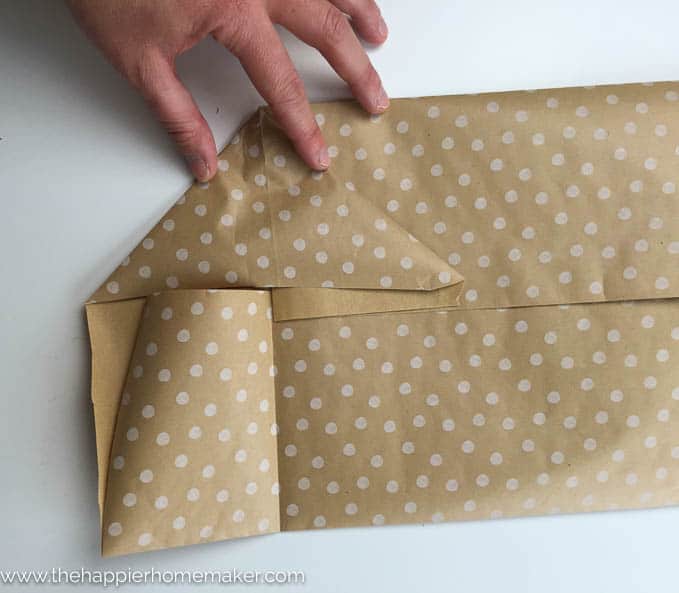
- Pull the top layer of the paper up towards the top to open it up in a triangle shape (this is so hard to describe-hence the pictures!)
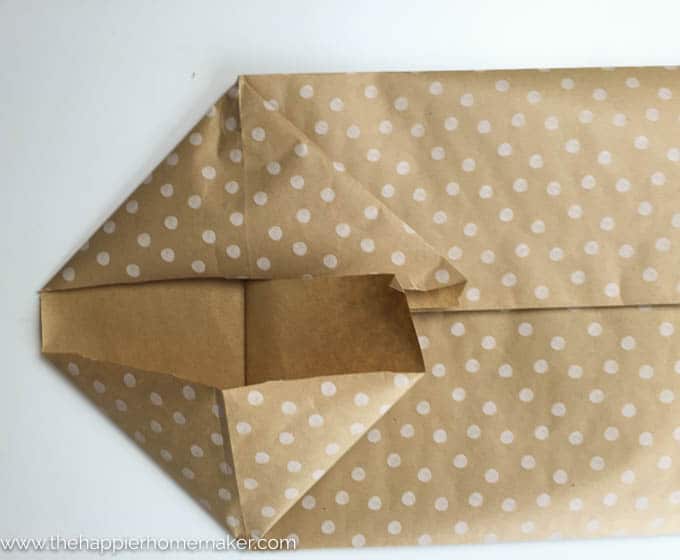
- Do the same on the other side.
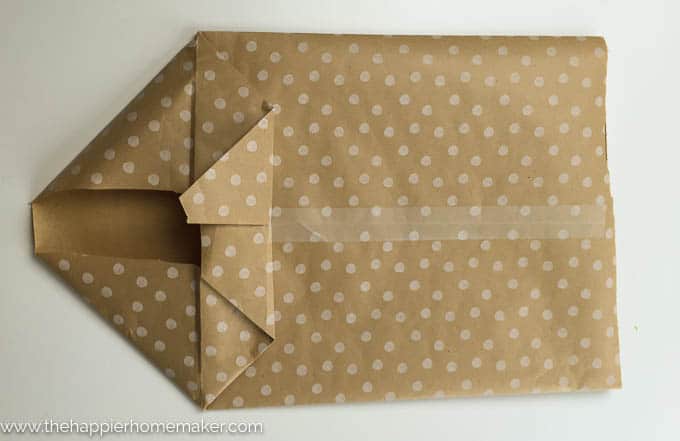
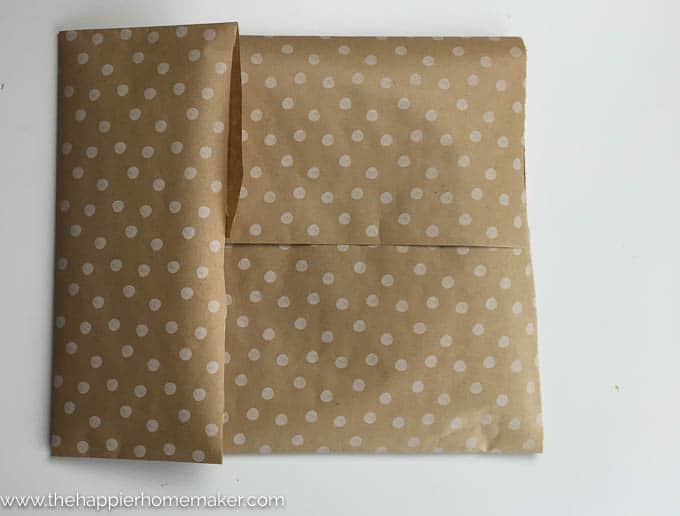
- Fold the ends toward the center, again making sure there is some overlap.
Almost done!
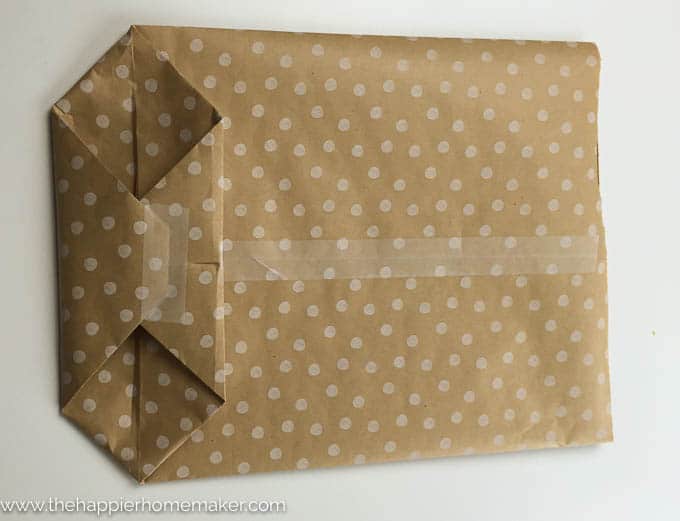
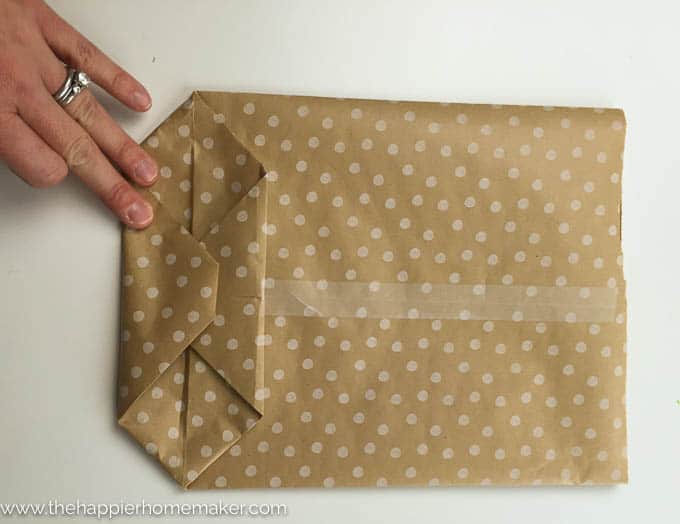
- Tape the bottom of the bag and you’re done! Open up the top and fill it up! You can fold the top over as in the picture at the top of the post and hole punch with some ribbon or tape it and add a bow-however you like!
Traditional Gift Bag
For the second type of bag-the more traditional one-you’ll need a few extra supplies-some double sided tape or adhesive and a box to use as a form.
- Start with enough paper to fully wrap your gift with a little extra room. Fold about a half inch over of whichever edge of of the paper will be the top of your bag. This gives it a more finished look. Secure with double sided tape or adhesive.
- Place you box on the paper and wrap the paper around it like you would any gift. Try not to wrap it too tight as it will make the box hard to remove later.
- Use adhesive to secure the overlapping paper.
- On the side of the bag you want to be the bottom, wrap as you would any gift.
- Secure with tape or strong adhesive.
- (optional) To make the bag stronger you can cut a piece of thin cardboard to place in the bottom.Use your fingers to make a sharp crease along the edges of the box
- Now that the top edge and bottom are secure and you’ve creased the edges you can remove the box from the paper-be gentle so you don’t rip the paper
- Gently pinch the edges of the top of the bag together to create a crease in the side of the bag.
- Continue creasing down the length of the side, stopping an inch or two (or more depending on the size of your bag) above the bottom.
- Use a hole punch at the top of the bag to make two holes.
- Thread ribbon through the holes and tie a knot on the interior as shown to make handles or you can choose to tie a ribbon through both sets of holes and secure with a bow to tie it closed.


So easy right?
Whew! That was a lot of pictures! I hope this tutorial helps-it’s good to know when you find yourself in a pinch without gift bags!


I couldn’t follow along with the pictures and words. Would it be possible for you to make a video tutorial, post it to YouTube, and then share the link here?
There is a video showing step by step just under the “save this article” section, above the materials. Hope that helps!