
Designing Your Own Candles
My husband’s birthday is next month and my older son is wanting to constantly make things for Daddy because we’re going to have to mail the package this week to ensure it gets to him overseas in time. Today I started running out of ideas so I decided to have him decorate a candle for his Dad.
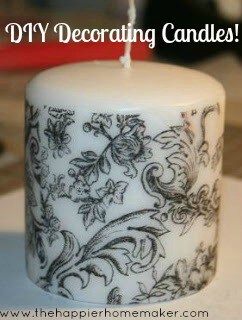
The supplies for this are simple: white tissue paper, a piece of wax paper, markers, a white candle (I get cheap ones at Walmart-must match the tissue paper color!), and a heat gun. You can get a heat gun for under $20 new, I bought mine off eBay a while back for under $10.
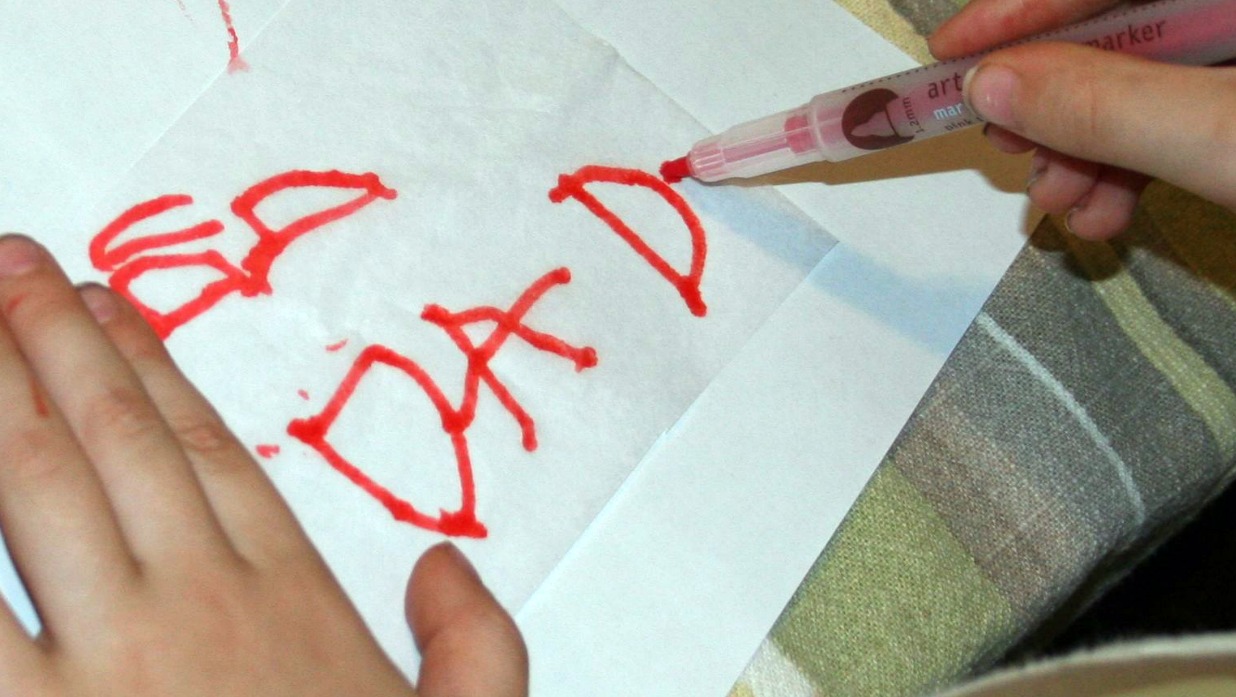
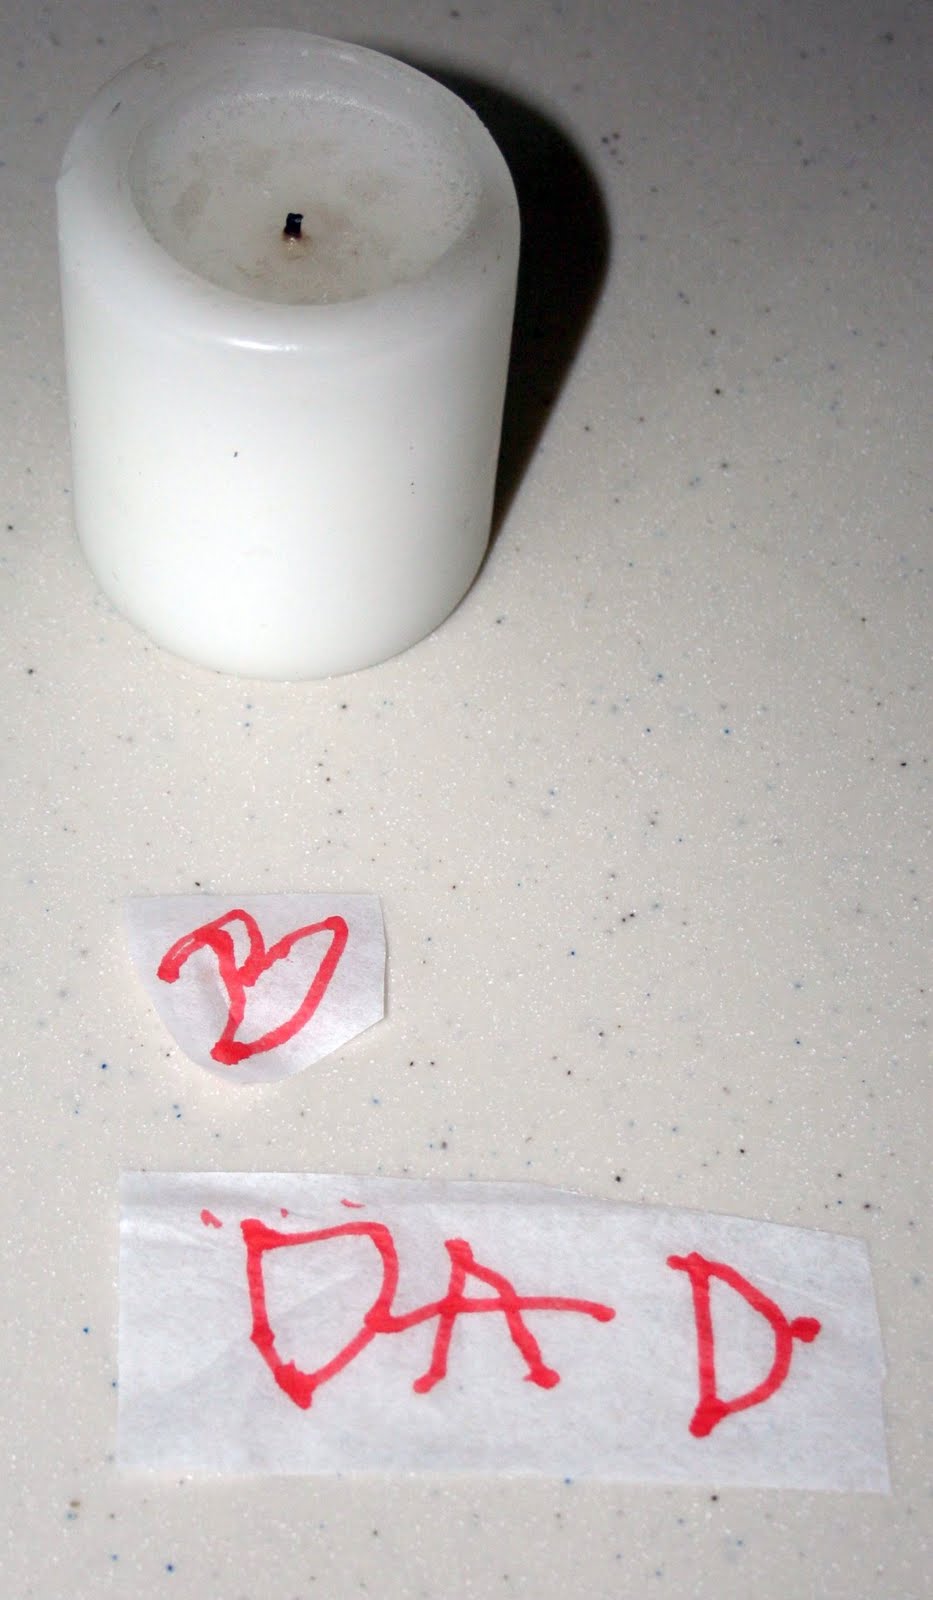
I snipped a piece of tissue paper and had my son decorate it. He wrote “Dad” and drew a heart.
I clipped around his work so that I could arrange it on the candle.
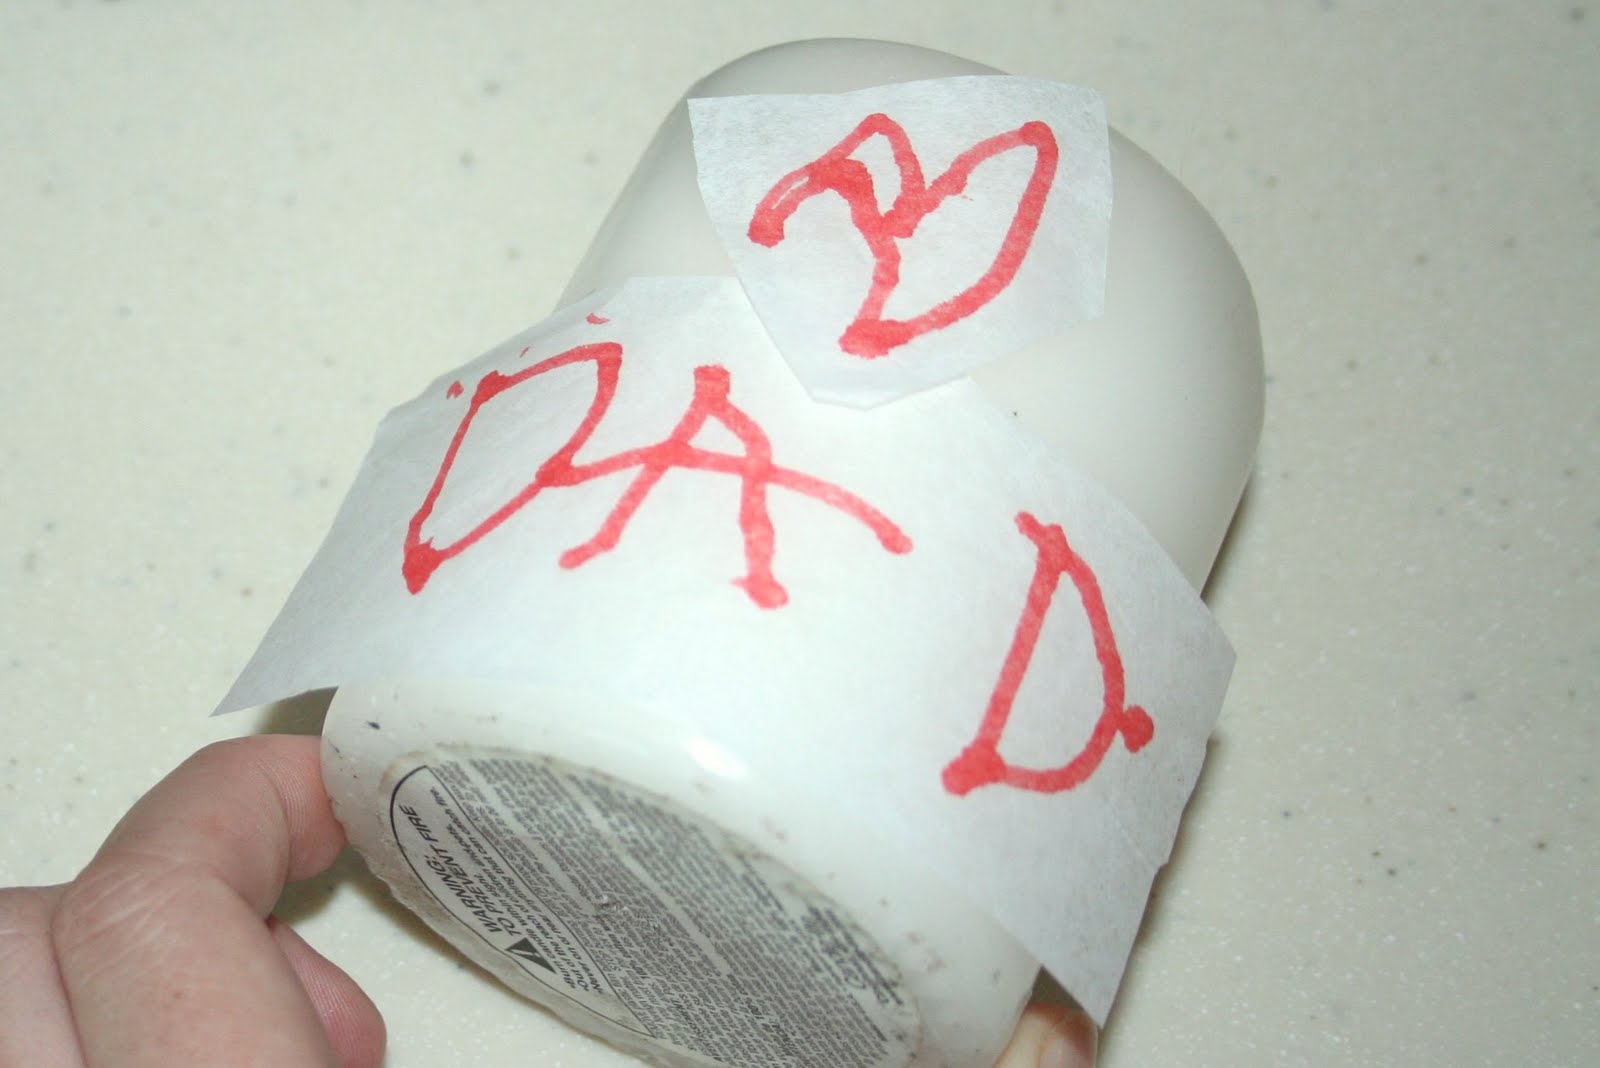
I positioned his drawings on the candle the way he wanted them and then covered it with the wax paper. I used my heat gun to heat up the candle where I had positioned the paper. I really, really tried to get a picture of that part but unfortunately the heat guns get really hot and I was about to get hurt trying to take a picture and heat the candle at the same time so you’ll have to make do with a description!
The heat gun is kind of like a tiny little super-duper hot blow dryer. It blasts out a soft breeze of air that gets super hot. The heat melts the wax on the wax paper enough so that the tissue paper absorbs it. When you move the heat gun and the surface cools (it cools within seconds) the tissue paper is now part of the outer wax layer of the candle. When you are heating it you will see the tissue paper absorb the wax, once you see this move on to the next area, you only want to melt it just enough so that the tissue paper absorbs it. If that isn’t clear enough, here is a YouTube video I made a couple years ago when I was a Stampin’ Up! demonstrator.
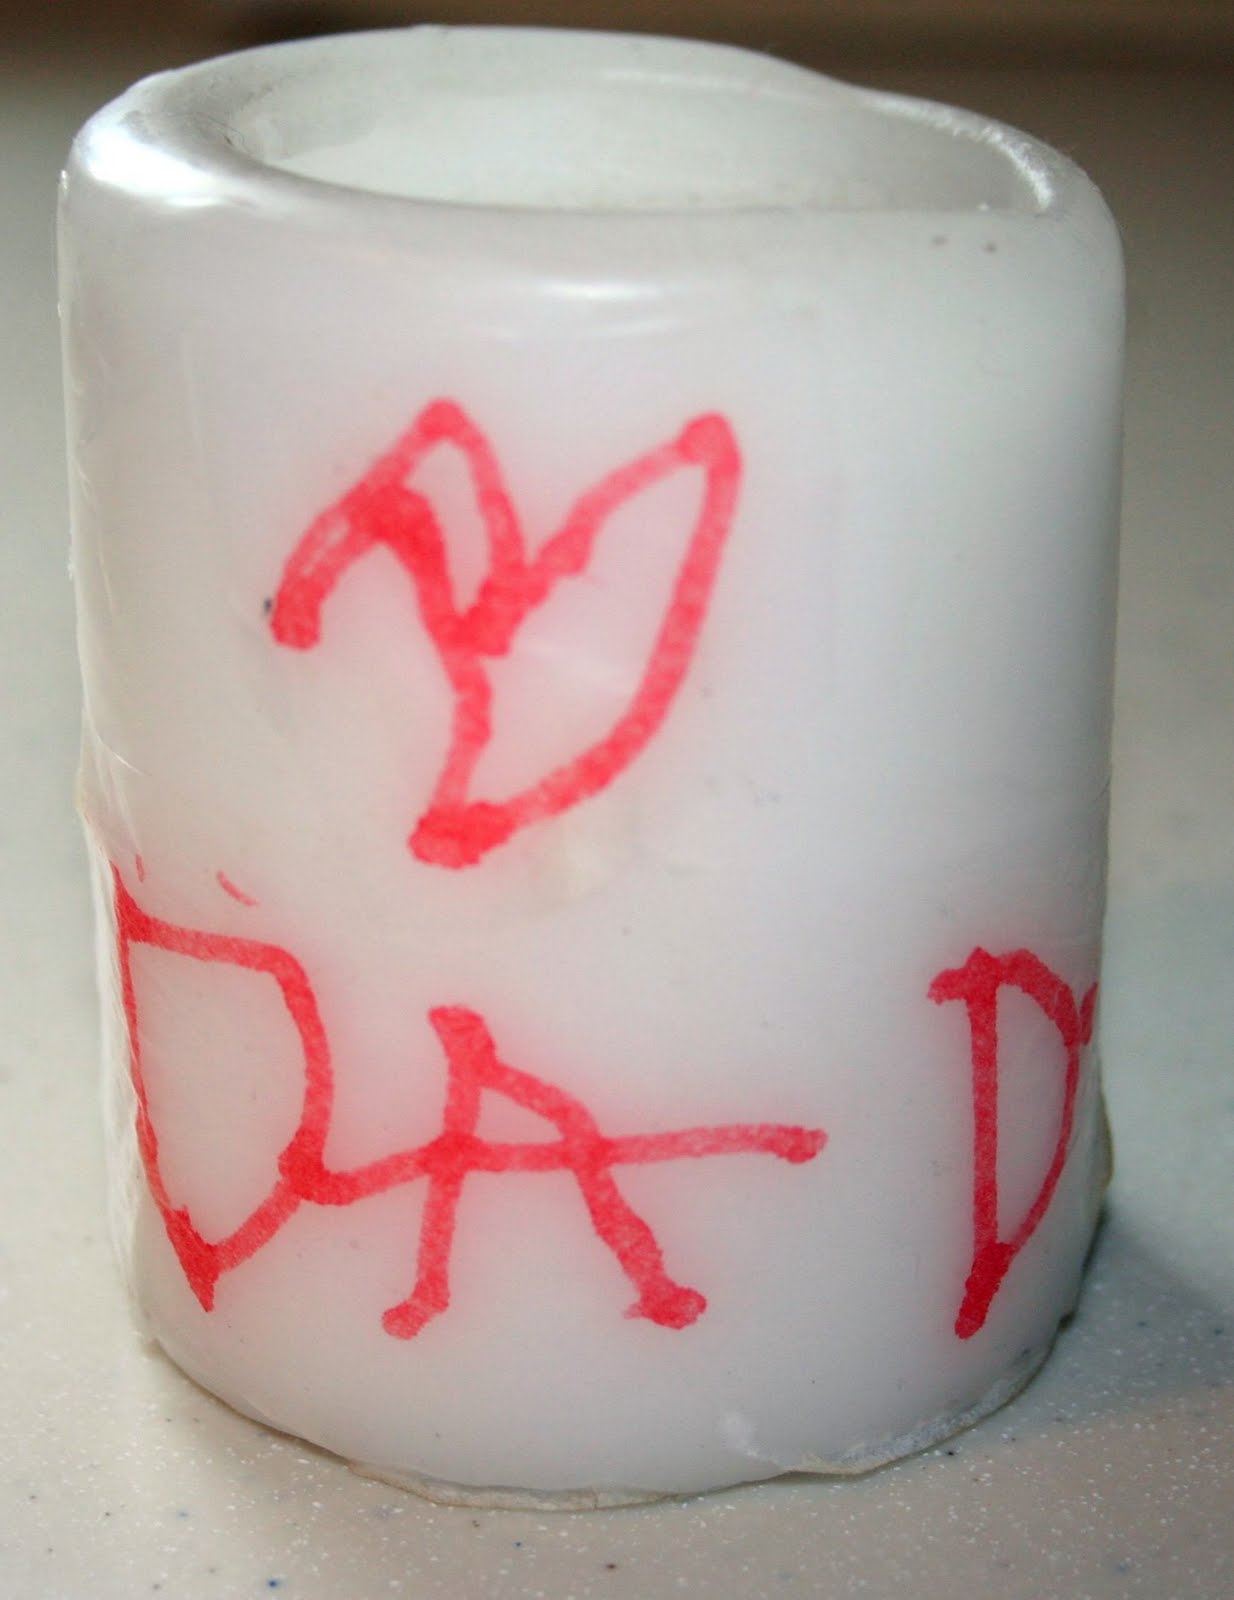
And here is the final result! Pretty cute!
This was the first time I tried this with my kids putting something on the tissue paper, I’ve made lots of these as Christmas gifts in the past using stamps on the tissue paper. Here is one I made with a large stamp so you can see the possibilities!


How fun!
That is so cool!!! I totally want to give it a go with the kids. 🙂 Thanks!
Wow! I learned something new today. I had no idea you could do that with stamps and tissue paper. Definately keeping that in mind! Thanks for dropping by and checking out my cabinet door memo board!
What a fun idea!
Thank you for linking up to {nifty thrifty sunday} last week!
I hope to see more of your creativity this weekend!
xoxo,
Vanessa
Thanks for sharing this great idea!
What a lot of possibilities I see – thanks to YOU!
This is genius, and will be a staple in my holiday crafting! Thanks so much for linking up to Delicately Constructed Fridays!! I am going to feature this project tomorrow evening! I hope you stop by!
Have a great day!
Michelle
http://www.delicateconstruction.blogspot.com
That is too cute!