
Decorated Stair Landing and Picture Hanging Tip
Remember last week when I shared my mile-long to do list? Well I’ve been steadily working to cross things off! I finally got around to finishing up my stair landing pick-me-up:

Quite honestly we have only lived in one house with stairs and when we did decorating was not a priority. In our new house however, the stair landing is easily seen when guests enter the house and it looked very neglected. The landing itself is a nice size but with the boys running around (not to mention a 100lb dog) I didn’t want to put a table or shelf there-it would most definitely get run over. The space also isn’t quite wide enough for a bench seat under the window. I decided to stick with window treatments and a couple of thrifty nautical pictures!

I already had a curtain rod on hand and my handy husband hung that up for me. I used my favorite curtains-Room Essentials Chesapeake in White (95″ length) from Target. I recently bought these for the entire downstairs and our Master bedroom as well-love them!
I posted yesterday how I made the two pictures for $12 each! I can’t get over how nicely they turned out! My only complaint is the back of the frame had double hooks and I hate hanging things on double hooks-seriously-it stresses me out that it won’t be level. If you’re the same, I’d like to share a tip on how I make sure that my picture are hung properly.
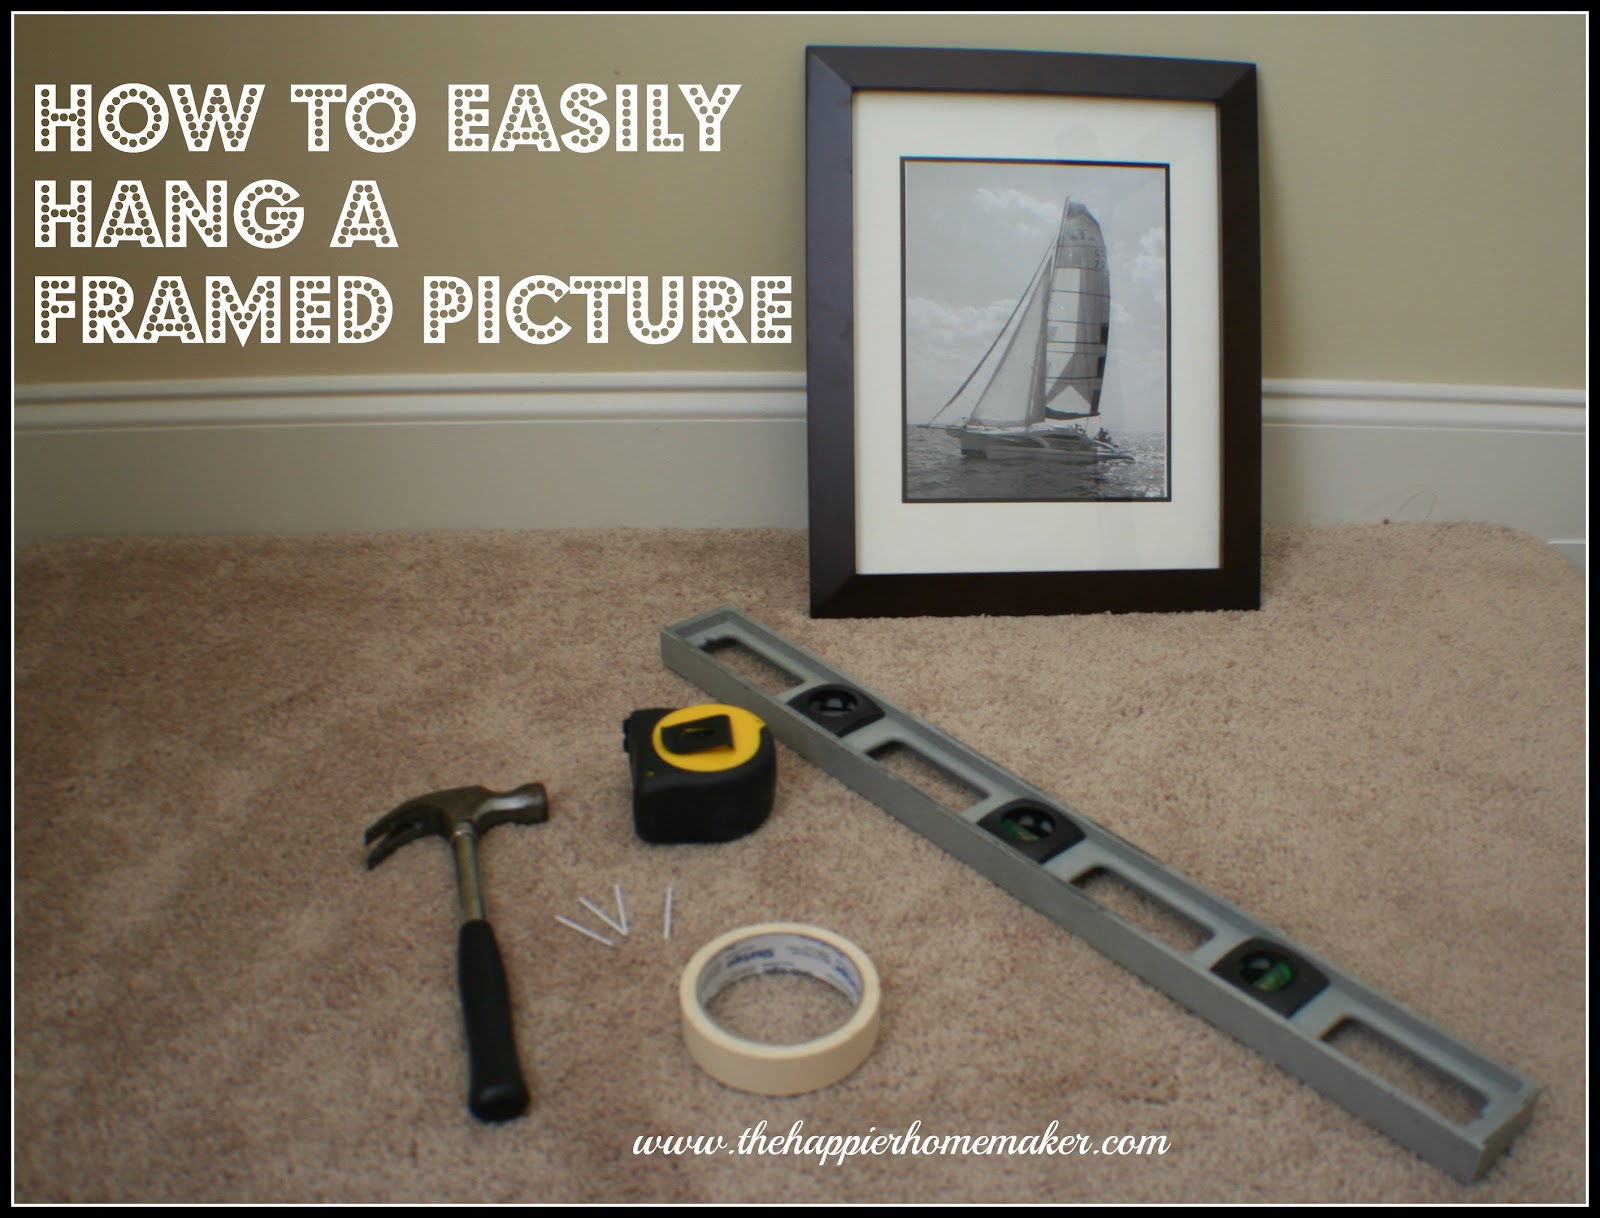
Frst you’ll need to gather your supplies: a hammer, nails (duh!), masking tape, tape measure, level, and a pen or pencil.
Tear a piece of masking tape wider than your two hooks and place it on the back of your frame just above the hooks. I was careful to place my flush with the top frame so I knew the picture would be straight if the tape was straight.

Mark the hook locations on your masking tape.

I hang most pictures at eye level so I put my nails at 6′ from the ground. I had also previously measured the space between my wall and curtains and determined I wanted my pictures 5.5 inches from the wall. The hooks were three inches from the side of the frame so I lined up my first mark on the masking tape at 8.5 inches from the wall. I then used the level to make sure my masking tape was straight.
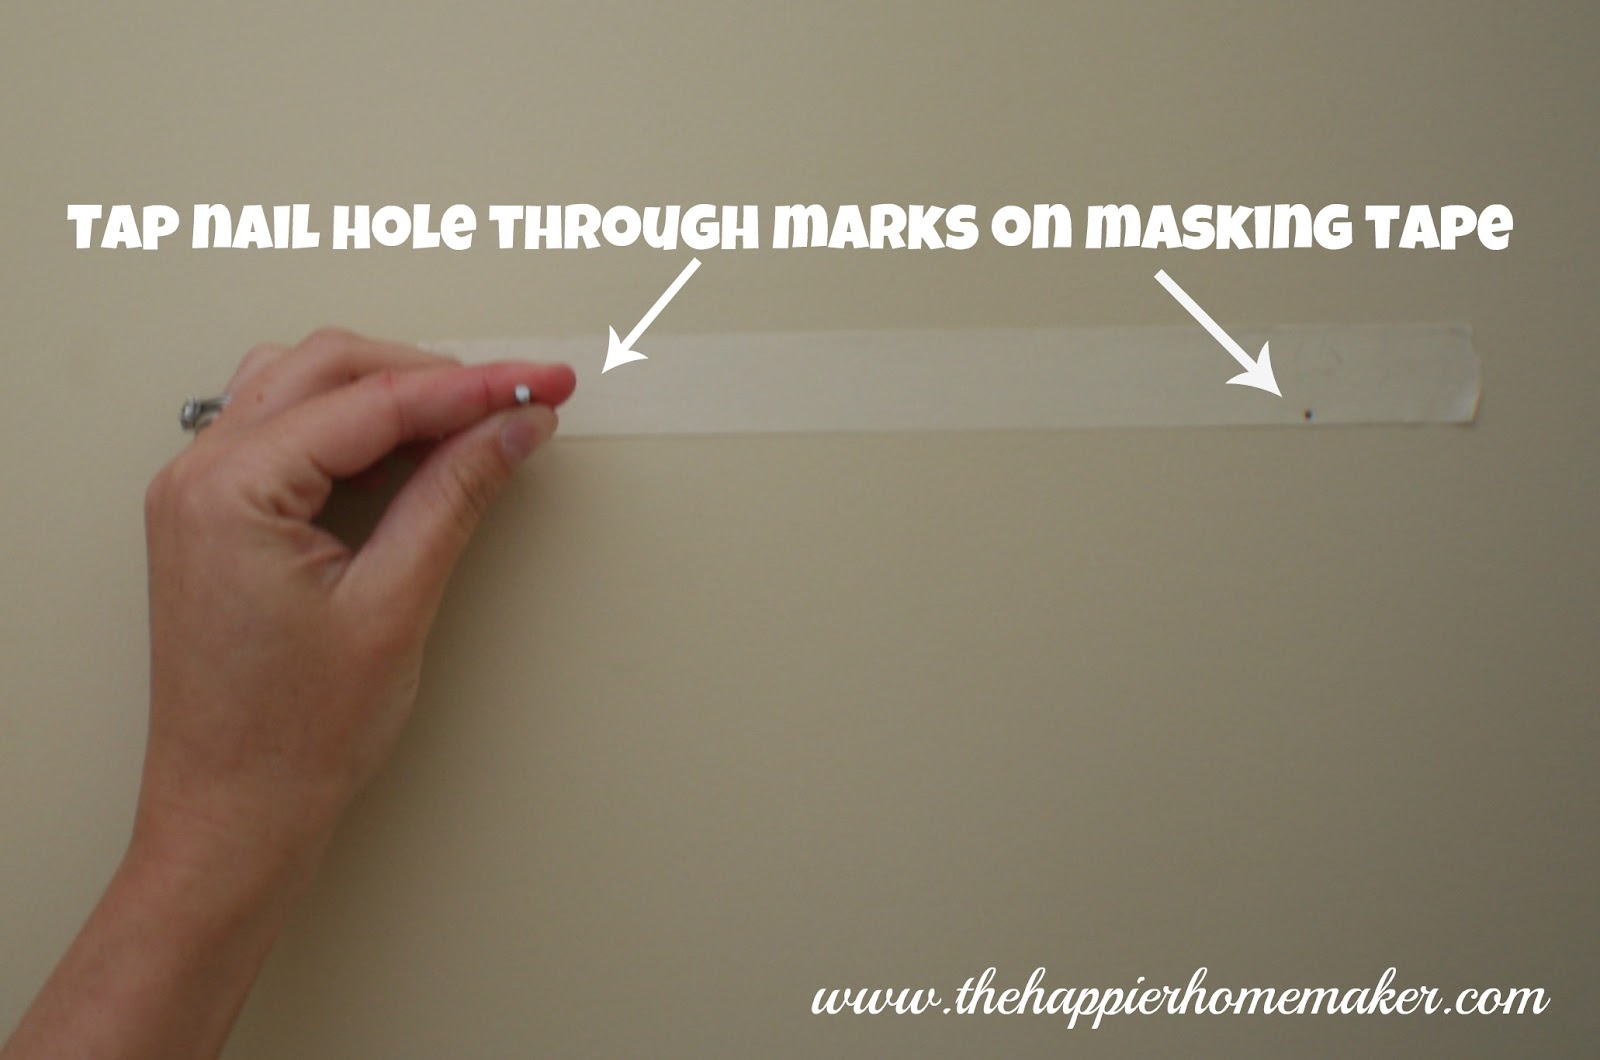
After my tape is perfectly straight I use the hammer to tap a small hole through each of my marks on the masking tape and then remove the tape from the wall. Place the nails in your two marked spot and hang the pictures-they should be perfectly level and your nails perfectly spaced! I can’t tell you how many holes I put in the walls trying to space my nails before learning this trick!
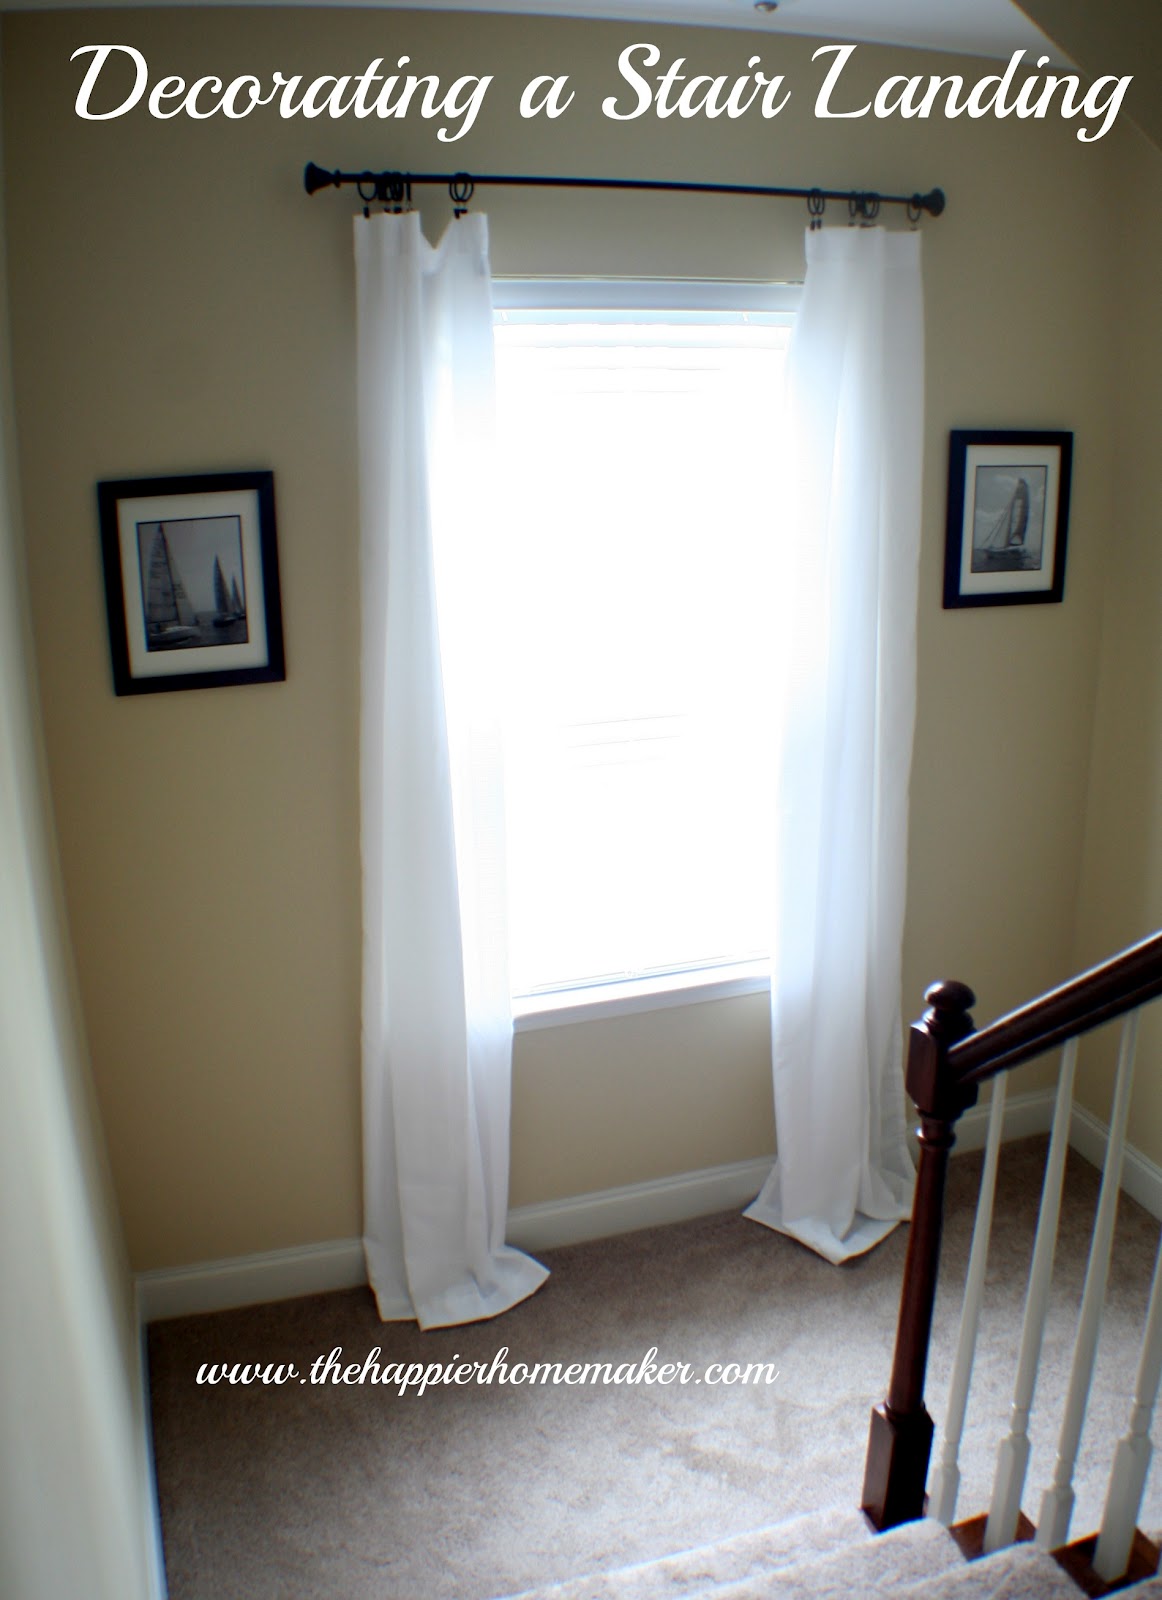
I am really happy with the way the quickie stair landing makeover turned out. It makes me smile everytime I pass through (which is a gazillion times a day!) I’m even happier knowing it was not too expensive!
Do you have a decorated stair landing area? How do you make the most of that space in your home? Let me know in a comment, or even better link a picture up in the comments so we can all see!


What a great idea with the masking tape! I also detest frames with two hooks. I usually string picture wire between the two holes, which NEVER results in anything good. Thanks for the tip!
That’s nice you have a window on the stair landing! Lots of extra light!
Bobi
https://westernwarmth.blogspot.com
The landing looks great! And smart tip about the masking tape. Thanks so much for sharing this at The Fun In Functional!